TL;DR:
- Outdoor light optics focus on controlling how light is shaped, directed, and distributed to enhance safety and curb appeal. Proper understanding of beam angles, aiming, and lux targets ensures professional-looking outdoor lighting that avoids glare and uneven illumination. Designing with optics first leads to more efficient fixture choices and a visually comfortable outdoor environment.
Outdoor light optics is the science of controlling how light is shaped, directed, and distributed to achieve specific results in exterior spaces. Understanding these principles separates a home that looks professionally lit from one that has bright spots, dark gaps, and uncomfortable glare. The core concepts, including lux, lumens, beam angle, and aiming, give you a framework for making decisions that improve both safety and kerb appeal. This guide explains outdoor light optics in practical terms, so every fixture choice you make has a clear purpose behind it.
How do outdoor light optics actually work?
Outdoor light optics is the applied science of directing photons from a source to a target surface with predictable results. The industry term for this discipline is photometric design, and it draws on geometric optics, which treats light as rays that can be calculated, angled, and shaped. Knowing how light behaves outdoors lets you predict exactly where brightness will land and where shadows will fall.
Three variables govern every outdoor lighting outcome: the total light produced by a fixture, the shape of the beam that delivers it, and the angle at which the fixture is aimed. Change any one of these and the result on the ground changes dramatically. A fixture that looks identical to another on a spec sheet can produce a completely different visual effect based on its optics alone.
The effects of light in outdoor spaces are also influenced by surface materials. Light-coloured concrete reflects more light than dark asphalt, which means the same fixture produces higher perceived brightness on a pale patio than on a dark driveway. Accounting for surface reflectance is part of professional photometric design, and it is a detail most homeowners overlook entirely.
Why is lux the right measurement for outdoor lighting?
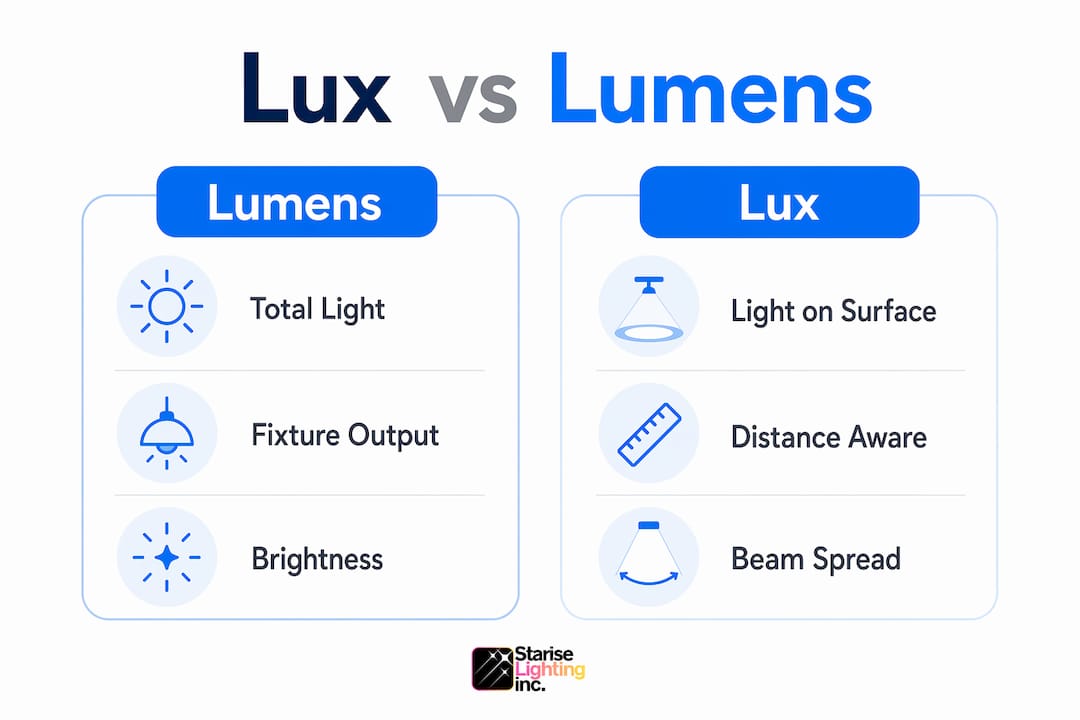
Lumens measure total light output from a source. Lux measures how much of that light actually lands on a surface. The distinction matters because a high-lumen fixture aimed poorly delivers far less usable light than a lower-lumen fixture aimed correctly.
1 lux equals 1 lumen per square metre, which means lux accounts for both distance and beam spread. That is why lux is the preferred unit for outdoor lighting design. It reflects what the eye actually perceives at the point of use, whether that is a front walkway, a garden bed, or a driveway.
The table below shows the practical difference between the two measurements:
| Measurement | Definition | What It Tells You | Practical Example |
|---|---|---|---|
| Lumens | Total light output from a fixture | How much light a bulb produces | A 1,000-lumen floodlight |
| Lux | Light falling on a specific surface | Brightness at the point of use | 50 lux on a front walkway |
For exterior lumens and lux, the rule is simple: start with a lux target for each zone, then select fixtures and optics that deliver it. Walkways typically need 5–10 lux for safe navigation. Driveways benefit from 10–20 lux. Feature trees or architectural walls can handle 50–100 lux for dramatic accent effects. Selecting fixtures based on lumens alone, without knowing the beam spread and mounting distance, is the most common planning error homeowners make.
Pro Tip: Set your lux targets before you shop for fixtures. Knowing you need 10 lux at ground level on a 3-metre-wide path tells you exactly what beam angle and output to look for, rather than guessing based on wattage.
How do beam angle and spread shape your outdoor lighting?
Beam angle is the cone of light emitted by a fixture, measured in degrees at the point where brightness drops to 50% of its peak. Beam spread describes how wide that cone lands on a surface at a given mounting height. Both determine whether light covers a space evenly or creates the distracting bright spots and dark gaps that make paths feel unsafe.
The practical effects of different beam widths break down clearly:
- Narrow beams (10–40°): Best for accent lighting, uplighting trees, and highlighting architectural features. On a walkway, narrow beams create a "row of islands" effect, with bright pools separated by dark sections that are genuinely hazardous at night.
- Medium beams (40–90°): Suited to wall washing, step lighting, and focused area coverage. These work well for porch lighting and garden feature illumination.
- Wide beams (90–120°): The right choice for general path lighting and open patio coverage. Overlapping wide beams produce uniform illumination without harsh transitions.
A 1,000-lumen narrow beam creates a hot spot, while a 300-lumen wide beam produces a more even and visually comfortable light pool. This is why raw lumen output is a poor guide to lighting quality. The optic, not the output, determines the result.
Pro Tip: For front walkways and driveways in Calgary's winters, choose wide-beam fixtures mounted at consistent intervals. Snow and ice make uneven lighting more dangerous, and wide beams reduce the contrast between lit and unlit sections.
What role does aiming play in glare and visibility?
Glare is the single most misunderstood problem in residential outdoor lighting. More brightness does not mean better visibility. Over-lighting causes pupil constriction, which makes the surrounding dark areas harder to read visually. The result is a yard that feels bright but is actually harder to navigate safely.
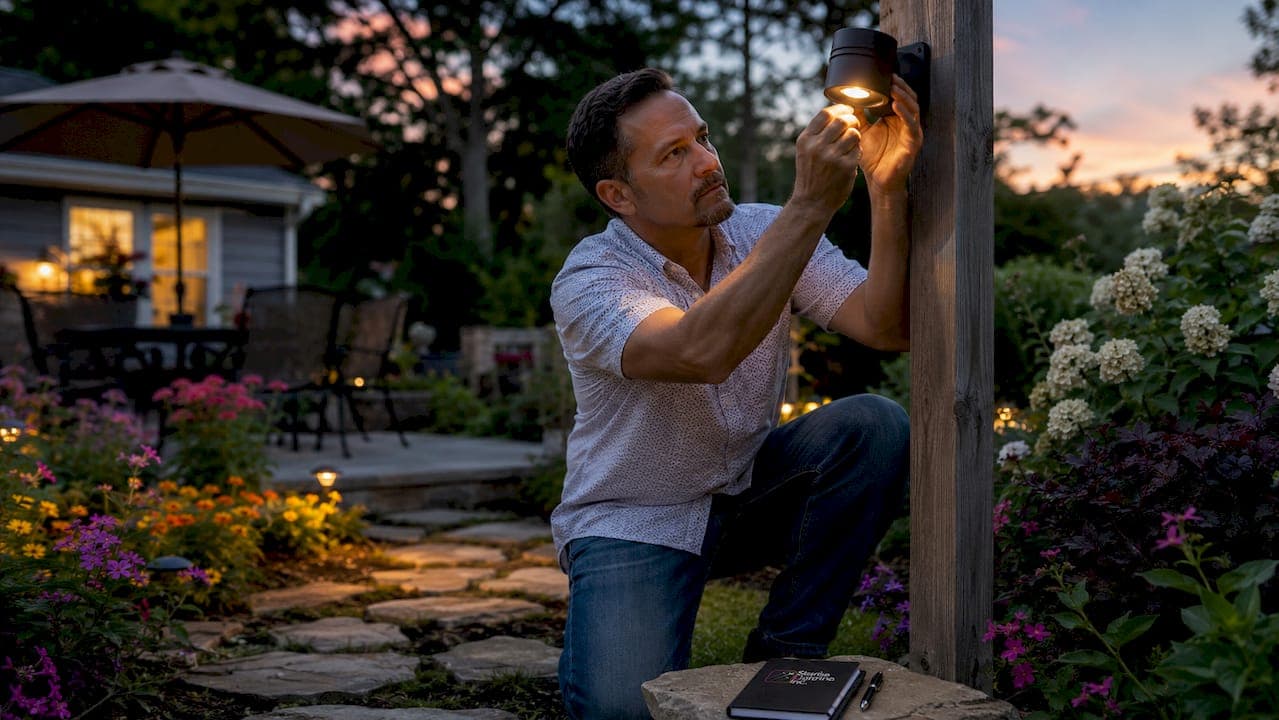
Fixture aiming is the primary control for glare. Tilting floodlights downward by 10–15 degrees moves the brightest part of the beam off eye level and onto the target surface. This single adjustment improves visibility more reliably than increasing output.
Signs of poor aiming are easy to spot:
- Hard shadows behind objects with no detail visible in them
- Bright hotspots that cause squinting when approaching the house
- Fixtures that are visible as a glowing source from the street or neighbouring properties
- Paths that look bright but feel uncomfortable to walk along at night
Full-cutoff fixtures emit no light above the 90-degree horizontal plane. They control glare by design, which means less reliance on post-installation adjustment. Choosing the right fixture type solves most aiming problems before installation begins.
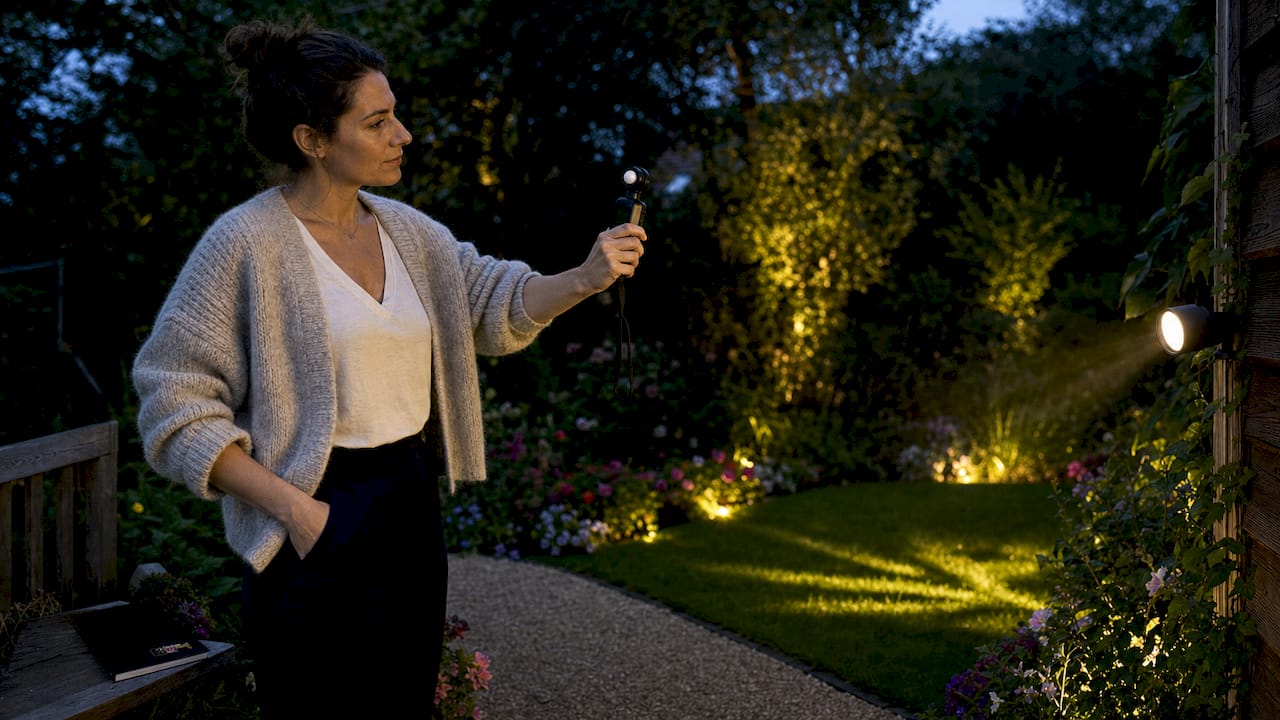
The hand-shade test is the fastest way to diagnose a glare problem. Stand in the lit area and block the light source with your hand. If visibility improves immediately, glare is the issue. If it does not, the problem lies in fixture spacing or surface reflectance instead.
For adjustable outdoor light options, fixtures with tilt and rotation controls let you fine-tune aiming after installation, which is particularly useful on homes where the ideal mounting position is fixed by architecture.
How does layering light create depth and atmosphere outdoors?
Professional outdoor lighting designs layer ambient, accent, and task lighting to achieve both function and atmosphere. Each layer uses different optics, and the combination creates visual depth that a single fixture type cannot produce.
Here is how to build a layered outdoor lighting scheme:
- Ambient lighting provides the base level of illumination across the entire space. Wide-beam fixtures mounted at eaves or on posts deliver even, low-contrast light that makes a property feel safe and welcoming. Lux targets here are modest, typically 5–15 lux across open areas.
- Task lighting focuses on specific functional zones: front steps, the garage apron, the path to the front door. These fixtures use medium beams aimed precisely at the surface being used. The lux target is higher, typically 20–50 lux, because these areas require clear visibility for safe movement.
- Accent lighting uses narrow beams to highlight architectural features, trees, garden sculptures, or textured walls. The goal is contrast and drama, not uniform coverage. A single well-aimed 10-degree uplight on a mature spruce creates more visual impact than six poorly aimed floodlights.
Lighting vertical surfaces like walls, fences, and tree trunks adds spatial depth that ground-level lighting alone cannot achieve. Vertical illumination connects the outdoor space visually to the interior, making the home feel larger and more cohesive from the street. Most homeowners focus entirely on horizontal surfaces and miss this effect completely.
The lighting design inspirations that work best combine all three layers with deliberate transitions between them. Moving from bright task zones to softer ambient areas feels natural to the eye. Jumping from darkness to a single bright floodlight does not.
What are the most common outdoor optics mistakes?
Most outdoor lighting problems trace back to a small set of repeatable errors. Recognising them before installation saves significant time and cost.
- Choosing fixtures by lumens alone. Output without optics context is meaningless. A fixture's beam angle and mounting height determine lux on the ground, not the lumen rating on the box.
- Spacing fixtures too far apart. Narrow-beam fixtures spaced too widely create patchy illumination with unsafe dark sections between pools of light. Overlapping wide beams solve this without requiring more fixtures.
- Using accent beams on paths. Narrow beams belong on features, not walkways. A 15-degree beam on a front path creates a spotlight effect that is both visually uncomfortable and functionally unsafe.
- Ignoring glare entirely. Bright is not the same as well-lit. Shielding, correct aiming, and warm colour temperature improve visual comfort far more than increasing raw output.
- Skipping vertical surfaces. Lighting only the ground flattens the visual perception of a space. Adding one or two vertical accents transforms the same property dramatically.
- Not testing before finalising. Place fixtures temporarily and walk the space at night before committing to permanent installation positions. What looks correct on a plan often needs adjustment in practice.
Key takeaways
Effective outdoor lighting depends on optics first and output second: lux targets, beam angles, and correct aiming determine results far more than lumen ratings.
| Point | Details |
|---|---|
| Lux over lumens | Design to lux targets for each zone; lumens alone do not predict real-world brightness. |
| Beam angle determines coverage | Use 90–120° beams for paths and patios; reserve narrow beams for accent and feature lighting. |
| Aiming controls glare | Tilt fixtures 10–15° downward and choose full-cutoff designs to improve visibility and comfort. |
| Layer all three light types | Combining ambient, task, and accent lighting creates depth and safety that single-layer designs cannot match. |
| Vertical surfaces matter | Lighting walls and trees adds spatial depth and connects outdoor spaces to the home's interior visually. |
Why optics should come before fixture shopping
Most homeowners I work with arrive having already bought fixtures. They chose based on wattage, style, or price, and then they wonder why the result looks flat, patchy, or uncomfortable. The optics conversation should happen first, not after the boxes arrive.
The single most useful shift in thinking is moving from "how bright is this fixture" to "what lux level do I need at this surface, and what beam angle delivers it from this mounting height." That reframe changes every decision that follows. It means you buy fewer fixtures, position them correctly the first time, and avoid the expensive process of replacing units that were never wrong in terms of output but were completely wrong in terms of optics.
Glare is the other issue I see consistently underestimated. A homeowner installs a 3,000-lumen floodlight on the garage and cannot understand why the driveway still feels unsafe at night. The fixture is too bright, aimed too high, and constricting the pupils of anyone walking toward it. Dropping to a 1,200-lumen full-cutoff fixture aimed 12 degrees downward solves the problem completely, and uses less energy doing it.
The last thing worth saying is that outdoor lighting is not a set-and-forget decision. Seasons change, trees grow, and the way a family uses outdoor space evolves. Revisiting your lighting plan every couple of years and running the hand-shade test on any fixture that feels uncomfortable costs nothing and keeps the result looking intentional.
— Starise
See how Co-starise puts these principles into practice
Co-starise designs and installs permanent outdoor lighting systems built around the optics principles covered in this article. Every fixture in the Co-starise range is selected for controlled beam spread, full-cutoff glare management, and precise aiming capability. The Gen 2 24V LED technology delivers consistent lux levels across Calgary's full range of seasonal conditions, from summer evenings to January snowfall.

If you are ready to move from guesswork to a photometrically designed exterior, Co-starise offers a no-obligation quote that starts with your lux targets, not a fixture catalogue. The result is a system that looks as good in February as it does in July.
FAQ
What is the difference between lumens and lux outdoors?
Lumens measure total light output from a fixture. Lux measures how much light lands on a specific surface, accounting for distance and beam spread. Lux is the correct unit for outdoor lighting design because it reflects actual visibility at the point of use.
What beam angle works best for a front walkway?
A beam angle of 90–120° is the right choice for walkways. Narrow beams below 40° create bright spots separated by dark gaps, which reduces safety and visual comfort on paths.
How do i know if my outdoor lights are causing glare?
Use the hand-shade test: stand in the lit area and block the light source with your hand. If visibility improves, glare is the problem. Tilting fixtures 10–15° downward or switching to full-cutoff fixtures resolves most glare issues.
Why does lighting vertical surfaces improve outdoor spaces?
Lighting walls, fences, and trees adds spatial depth that ground-level lighting cannot produce. Vertical illumination makes outdoor spaces feel larger and more connected to the home's interior when viewed from the street.
What lux level is safe for a residential driveway?
A driveway needs approximately 10–20 lux for safe vehicle and pedestrian use. Walkways require 5–10 lux. Feature areas lit for accent purposes can reach 50–100 lux depending on the desired visual effect.