
TL;DR:
- Adjustable outdoor lights provide flexible beam aiming to highlight landscape features and enhance security. Proper planning, safe installation, and regular maintenance ensure effective use and longevity of these fixtures. Modifiable fixtures and smart controls help adapt lighting over time, maximizing property value and visual appeal.
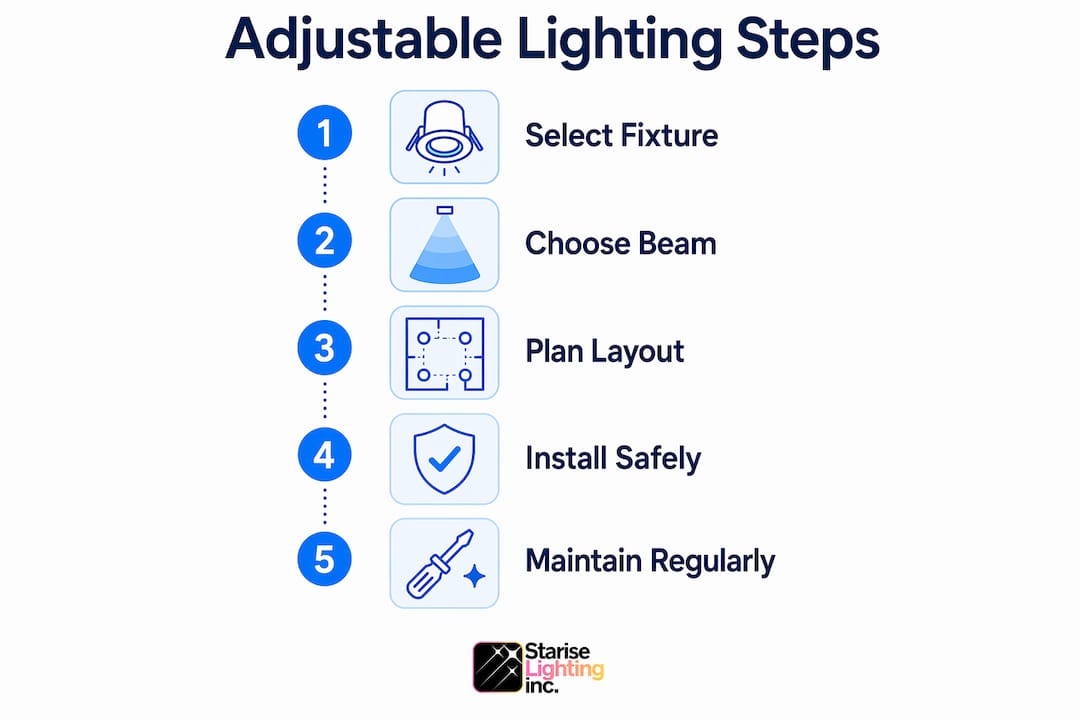
Adjustable outdoor lights are fixtures designed to let you change the direction and focus of the light beam, giving you maximum flexibility to illuminate your property's exterior exactly where it counts. Unlike fixed fittings, directional outdoor lighting lets you aim beams at specific features, shift coverage as your garden grows, and integrate motion sensors or smart controls for added security. This guide to adjustable outdoor lights covers every stage: fixture types, layout planning, safe installation, and long-term maintenance, so you can make confident decisions whether you're upgrading a Calgary driveway or redesigning a backyard garden.
What types of adjustable outdoor lights are available?
Directional outdoor lighting comes in five main fixture categories, each suited to different applications and mounting situations.
- Spotlights and stake-mounted fixtures: Stake lights push directly into garden beds and aim at trees, shrubs, or sculptures. They are the most repositionable option and represent a cost-effective choice for evolving landscape lighting needs.
- Floodlights: Wide-beam fixtures that cover large areas like driveways, patios, or building facades. Most models swivel on a mounting arm, letting you shift coverage by 180° horizontally.
- Track lighting: A rail-mounted system where individual heads slide along a track and rotate independently. Track systems are popular for covered patios and pergolas because you can reposition heads without rewiring.
- Gimbal recessed lights: Recessed ceiling fixtures with a rotating inner ring. Gimbal lights tilt and swivel 35 to 45 degrees, eliminating harsh light cones and hot spots under soffits or covered entries.
- Wall-mounted adjustable fixtures: Bracket-mounted lights with a swivelling head, common at garage doors and side entries.
Beam angles and colour temperature
Beam angle ranges divide into narrow (15 to 25 degrees) for statues and tree trunks, and medium (30 to 40 degrees) for facades and hedgerows. Narrow beams create drama; medium beams create wash. Most LED gimbal and spotlight fixtures use dimmable warm white bulbs rated at 2700K to 3000K, which complement natural materials like stone and timber far better than cool white alternatives.
Motion sensors and weatherproofing
Motion sensors integrated into adjustable fixtures add a security layer without extra hardware. Sensors with adjustable sensitivity up to 40 feet and a 240-degree detection range cover most residential entry zones. For weatherproofing, look for an IP65 rating at minimum. This rating confirms the fixture is dust-tight and protected against direct water jets, which matters greatly through Calgary winters.
Pro Tip: Never mix housings and trims from different manufacturers on recessed gimbal units. Mismatched components cause light leakage and safety concerns that are difficult to diagnose after installation.
| Fixture type | Best use | Beam angle | Adjustability |
|---|---|---|---|
| Stake spotlight | Trees, shrubs, sculptures | 15–25° narrow | Full reposition by hand |
| Floodlight | Driveways, facades | 90–120° wide | 180° swivel arm |
| Track head | Patios, pergolas | 30–60° variable | Slide and rotate on rail |
| Gimbal recessed | Soffits, covered entries | 35–45° tilt/swivel | Tilt and swivel in housing |
| Wall-mount bracket | Garage, side entries | 40–60° medium | Swivel head on bracket |
How do you plan an outdoor lighting layout?
Planning is the step most homeowners skip, and it is the one that determines whether the finished result looks professional or patchy. Start by walking your property at night with a torch and mapping three zones: pathways and steps that need task lighting, security zones like entry points and dark corners, and focal points such as trees, garden walls, or architectural details.

Lumen output is your primary planning variable. Small shrubs need 100 to 200 lumens, medium trees between 15 and 25 feet tall need 300 to 500 lumens, and large feature trees or building facades need 700 lumens or more. Matching output to feature size prevents the flat, overlit look that makes a garden resemble a car park. For more detail on matching brightness to your specific garden elements, the Co-starise guide on exterior lumen levels is worth reading before you buy.
Follow these steps to build your layout plan:
- Sketch your property to scale. Mark the house footprint, garden beds, trees, pathways, and entry points. Note existing power outlets and junction boxes.
- Assign a lighting layer to each zone. Ambient lighting covers general areas, task lighting serves pathways and steps, and accent lighting highlights focal points.
- Choose beam angles per target. Narrow beams for vertical features like tree trunks and statues, medium beams for horizontal surfaces like hedges and facades.
- Calculate fixture count per zone. Divide the total lumen requirement for each zone by the output of your chosen fixture to get the number of units needed.
- Mark cable routes. Plan conduit paths that avoid tree root zones. For tree uplighting, position lights outside the drip line to protect roots and prevent fire hazards near insulated ceilings.
- Test before you commit. Place stake fixtures loosely and view the result from the street and key windows before driving them in permanently.
Pro Tip: Test fixture placement at night from multiple angles before final installation. Daylight assessments miss glare, hot spots, and uneven coverage that only become obvious after dark.
| Feature | Recommended lumens | Suggested beam angle |
|---|---|---|
| Small shrub (under 5 ft) | 100–200 | 15–25° narrow |
| Medium tree (15–25 ft) | 300–500 | 30–40° medium |
| Large tree or facade | 700+ | 40–60° wide |
| Pathway or steps | 100–200 | 60–90° downward |
| Garage or entry door | 300–500 | 90–120° flood |
How to safely install adjustable outdoor lights
Safe installation starts with understanding your electrical capacity. A standard 15-amp household circuit supports roughly 1,440 watts, and outdoor wiring must meet IP65 or higher weather resistance ratings. Most LED landscape systems draw far less than this, but adding multiple zones to a single circuit without checking the load is a common and costly mistake.
Gather these tools and materials before you begin:
- Voltage tester and circuit breaker access
- Weatherproof outdoor-rated cable (minimum 12-gauge for 20-amp circuits)
- Conduit or direct-burial cable for underground runs
- Waterproof wire connectors and junction boxes rated for outdoor use
- Drill, hole saw, and screwdriver set
- Mounting hardware supplied with each fixture
Mounting and aiming the fixtures
Once wiring is in place, mounting adjustable fixtures follows a straightforward sequence. Attach the base or bracket to the mounting surface, connect the wires inside the weatherproof junction box, then set the initial aim loosely before tightening. For gimbal recessed units, insert the housing into the soffit cutout and lock the clips before adjusting the inner ring to your target angle. For stake lights, push the stake into the soil at roughly 45 degrees pointing toward the feature, then refine the angle after viewing from a distance.
Mount motion sensors 6 to 10 feet high, angled downward to cover entry zones, and keep them away from heat sources like dryer vents or barbecues to prevent false triggers. Set sensitivity and timer controls after installation by testing the detection zone with a walk-through at the expected approach angle.
Safety note: Always switch off the circuit breaker and confirm zero voltage with a tester before touching any wiring. Outdoor circuits can carry lethal current even when a switch is off. If your home's wiring is older than 25 years or you are unsure about circuit capacity, consult a licensed electrician before proceeding.
Pro Tip: For a smooth DIY process, review the Co-starise walkthrough on outdoor lighting installation before starting. It covers Calgary-specific code considerations that apply to most Canadian residential properties.
Common installation mistakes to avoid
The most frequent error is over-tightening swivel joints before the final aim is confirmed. Tighten only after you have viewed the result from the street at night. The second most common mistake is running undersized cable to save money, which causes voltage drop and dim output at the far end of a long run. Use the correct gauge for the run length, and always leave a service loop of extra cable at each fixture for future adjustments.
How do you maintain and adjust outdoor lights over time?
Adjustable outdoor lighting is not a set-and-forget system. 180-degree swivel and 90-degree tilt capability means your fixtures can follow your landscape as it changes, but only if you revisit the aim periodically. A tree that was 12 feet tall when you installed the lights may be 20 feet tall three years later, requiring a complete re-aim and possibly a lumen upgrade.
Build these maintenance habits into your annual routine:
- Spring re-aim: After winter, check that freeze-thaw cycles have not shifted stake fixtures or loosened wall-mount brackets. Re-aim any fixture that has moved.
- Lens cleaning: Wipe lenses with a damp cloth every three to four months. Dirt and oxidation reduce output by up to 30 percent over time without any visible sign of damage.
- Bulb and battery checks: LED bulbs in quality fixtures last 25,000 to 50,000 hours, but driver components can fail earlier. Replace any fixture showing flicker or colour shift.
- Seasonal adjustments: Deciduous trees change the light they block between summer and winter. Adjust beam angles in autumn when leaves drop and again in spring when foliage returns.
- Smart integration: Smart lighting apps enable brightness and scene control without physical adjustments, which is particularly useful for seasonal changes or when you want to shift from security mode to entertaining mode.
Pro Tip: Overlighting causes glare and reduces depth perception outdoors. If a feature looks washed out rather than highlighted, reduce the lumen output or narrow the beam angle before adding more fixtures. Less output, aimed precisely, always outperforms more output aimed loosely.
For guidance on keeping your system performing through harsh Canadian winters, the Co-starise article on outdoor lights in winter covers seasonal adjustment and weatherproofing in detail.
Key takeaways
Adjustable outdoor lighting delivers lasting value only when fixture type, lumen output, beam angle, and installation safety are matched to the specific features and zones of your property.
| Point | Details |
|---|---|
| Match lumens to feature size | Use 100 to 200 lumens for small shrubs, 300 to 500 for medium trees, and 700+ for large features. |
| Choose beam angle by target | Narrow beams (15 to 25 degrees) suit vertical features; medium beams (30 to 40 degrees) suit facades and hedges. |
| Test placement at night | Always view fixture positions after dark before permanent installation to catch glare and hot spots. |
| Respect circuit capacity | A 15-amp circuit supports roughly 1,440 watts; always verify load and use IP65-rated wiring outdoors. |
| Revisit aim annually | Landscape growth and seasonal changes require periodic re-aiming to maintain intended coverage and aesthetics. |
What I have learned from years of outdoor lighting projects
The single biggest mistake I see homeowners make is buying fixtures before they have stood in their garden at night and looked at what actually needs light. Catalogues and product pages show beautifully lit show homes. Your garden is different, and the only way to understand it is to be in it after dark.
My second observation is that modular, adjustable fixtures are almost always worth the extra cost over fixed alternatives. A fixed spotlight aimed at a shrub that doubles in size within two seasons becomes useless. Adjustable track or stake-mounted lights let you reposition and expand without touching the wiring, which saves real money over time.
The brightness question is where most people get it wrong in the opposite direction. They assume more lumens means better results. Properly aimed adjustable beams create contrast and depth that fixed, high-output floodlights simply cannot replicate. A 300-lumen spotlight aimed precisely at a birch trunk looks more dramatic than a 1,000-lumen floodlight washing the whole garden.
Finally, do not let electrical uncertainty stop you from starting. Most landscape lighting runs on low-voltage systems that are genuinely DIY-friendly. Where you are connecting to mains circuits, especially for floodlights or motion sensor wiring, bring in a licensed electrician for that one step. The rest of the project is yours to own.
— Starise
Permanent outdoor lighting from Co-starise

Co-starise designs and installs permanent LED lighting systems built specifically for Calgary's climate, using Gen 2 24V LED technology that delivers precise, adjustable colour and brightness through a simple app. Every fixture is weatherproofed for Canadian winters and installed once along your roofline, soffits, or fascia, so there is no seasonal setup or teardown. If the planning and installation steps in this guide feel like more than you want to manage alone, Co-starise handles the full process from layout design to final aim. Explore the full range of permanent lighting solutions to see how a professionally installed, app-controlled system compares to a DIY adjustable setup.
FAQ
What are adjustable outdoor lights?
Adjustable outdoor lights are directional fixtures that let you change the aim, beam angle, or intensity of the light output after installation. Common types include spotlights, gimbal recessed lights, track heads, and stake-mounted fixtures.
What beam angle should I use for tree uplighting?
Use a narrow beam of 15 to 25 degrees for tree trunks and statues, and a medium beam of 30 to 40 degrees for broader canopies or building facades. Position stake lights outside the tree's drip line to protect roots.
How many lumens do I need for outdoor lighting?
Small shrubs need 100 to 200 lumens, medium trees need 300 to 500 lumens, and large trees or facades need 700 lumens or more. Matching output to feature size prevents glare and overlighting.
Is it safe to install outdoor lights myself?
Low-voltage landscape lighting systems are safe for most DIY homeowners. For any work connecting to a mains circuit, a standard 15-amp circuit supports roughly 1,440 watts, and all outdoor wiring must meet IP65 weather resistance ratings. Consult a licensed electrician if you are unsure about circuit capacity.
How often should I re-aim my outdoor lights?
Re-aim fixtures at least once a year, ideally in spring after freeze-thaw season and again in autumn when deciduous foliage changes. Smart lighting apps allow brightness and scene adjustments remotely without physical re-aiming for routine changes.