TL;DR:
- Calgary outdoor lighting must use weatherproof fixtures rated at least IP65 to withstand harsh winter conditions. Proper design with layered, shielded fixtures enhances security, curb appeal, and durability, while regular maintenance prevents common winter failures. Installing permanent, app-controlled LED systems tailored for Calgary's climate offers long-lasting, low-maintenance illumination solutions.
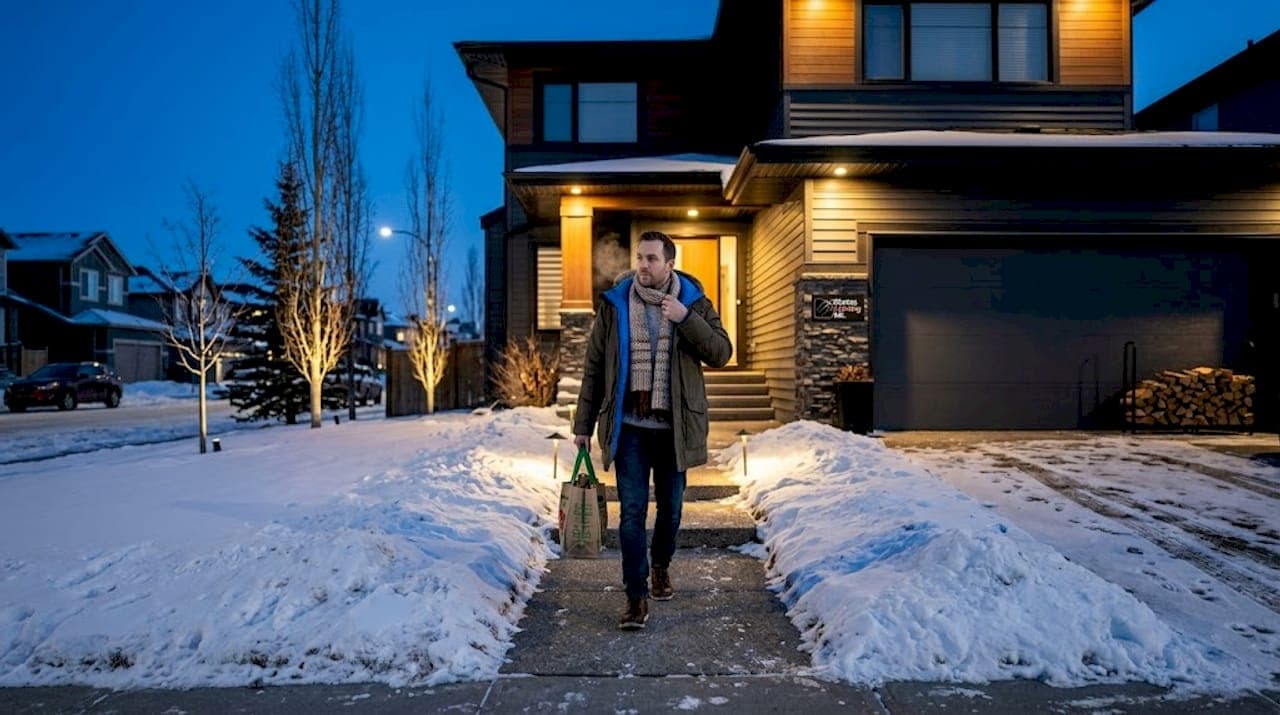
Calgary winters are brutal. By the time November arrives, darkness falls well before dinner, your front yard disappears into shadow, and a poorly lit pathway can turn a routine evening into a genuine hazard. Yet the right outdoor lighting system does far more than push back the dark. It signals to neighbours and visitors that your home is well-maintained, it deters opportunistic intruders, and it frames your property's best architectural features in a way that holds up beautifully through freeze-thaw cycles, blowing snow, and temperatures that can plunge past minus 30. This guide walks you through every step, from gathering materials to fine-tuning the final glow.
Table of Contents
- What you need for Calgary outdoor lighting
- How to design and place outdoor lights
- Step-by-step outdoor light installation
- Colour temperature and controls for Calgary homes
- Common issues and maintenance for lasting results
- What most outdoor lighting advice misses in Calgary
- Upgrade your Calgary home with permanent lighting
- Frequently asked questions
Key Takeaways
| Point | Details |
|---|---|
| Layering is key | Combine uplighting, downlighting, and path lights to eliminate dark spots and ensure even coverage. |
| Protect against winter | Select weatherproof fixtures and manage water around installations for long-lasting performance. |
| Colour temperature matters | Use warm white lighting for curb appeal and comfort, cool white for security tasks. |
| Routine checks boost reliability | Regular inspections and maintenance are critical to keep outdoor lighting safe and bright in Calgary. |
What you need for Calgary outdoor lighting
With the challenge clear, let's cover the essentials you'll need before a single fixture goes into the ground. Skipping this stage is the single biggest reason outdoor lighting projects fail before the first hard frost.
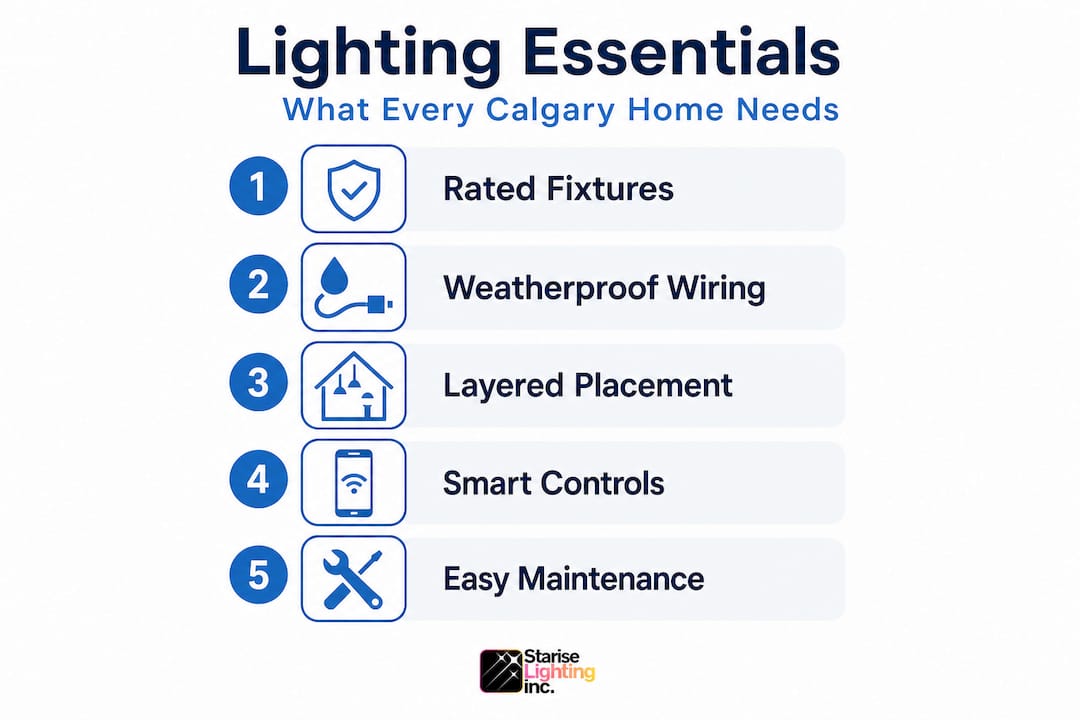
Weather-resistant materials are non-negotiable. Calgary's climate swings between extreme cold and rapid warming events. Standard residential fixtures sold in big-box stores are often rated for mild climates, not for the ice loading and moisture intrusion that comes with Alberta winters. You need fixtures rated at minimum IP65 (dust-tight and protected against low-pressure water jets) and ideally IP67 for any ground-level or path-mounted units. Outdoor electrical components must be protected from moisture, ice, and snow load for safe winter operation.
Core materials checklist:
- LED fixtures rated IP65 or higher
- GFCI-protected outlets (mandatory for any exterior circuit in Canada)
- Weatherproof wire connectors and conduit rated for burial or exterior exposure
- UV-resistant cabling designed for outdoor, cold-temperature flexibility
- Waterproof junction boxes with compression fittings
- Stainless or coated mounting hardware to resist rust from road salt spray
Basic tools you'll need:
- Measuring tape and marking stakes
- Circuit tester and voltage meter
- Wire strippers and insulated pliers
- Ground fault circuit interrupter (GFCI) tester
- Spade shovel or cable-laying tool for buried runs
For ongoing care, review exterior lighting maintenance tips before you start so you plan for access points during installation rather than retrofitting them later.
Pro Tip: Purchase a small roll of self-amalgamating tape (sometimes called "self-fusing" tape). It creates a completely waterproof seal over wire connections and costs very little, yet it is one of the most effective tools against Calgary's freeze-thaw moisture intrusion.
| Material | Minimum specification | Why it matters in Calgary |
|---|---|---|
| Fixture rating | IP65 or IP67 | Resists ice melt and blowing snow |
| Wire gauge | 12 AWG or heavier | Handles cold-induced resistance increase |
| Junction boxes | Weatherproof, compression-fit | Prevents moisture wicking at entry points |
| Mounting hardware | Stainless or coated steel | Road salt and de-icing chemicals cause rapid rust |
| Circuit protection | GFCI breaker | Mandatory under Canadian electrical code |
How to design and place outdoor lights
With tools assembled, the next step is designing a layout that maximises security, curb appeal, and winter durability. A poorly thought-out plan results in dark corners, harsh glare, and fixtures that fight each other instead of working together.
Layered lighting is the foundation. Layered landscape lighting eliminates dark spots and creates genuine depth, making a home look far more polished than a row of identical path stakes ever could. The four main layers are uplighting (pointing upward at trees, pillars, or facades), downlighting (mounted overhead to simulate moonlight or illuminate broad areas), path lighting (low-level fixtures guiding movement), and accent lighting (tightly focused beams that highlight specific features like stonework or garden sculptures).
Start at the front entrance. Security and first impressions both begin at the door. Plan your lighting around entrances and pathways first, then work outward to address dark corners. A front entry flanked by two wall-mounted fixtures at roughly eye level (about 1.5 to 1.8 metres above grade) creates welcoming symmetry. Add a single downlight above the door itself for functional task lighting when arriving with groceries or keys.
Pathway spacing matters more than most guides admit. Pathway fixtures should be spaced 6 to 8 feet (roughly 1.8 to 2.4 metres) apart for even illumination. Closer spacing creates a runway effect; wider spacing leaves pools of darkness between cones of light. In Calgary, factor in the eventual depth of packed snow when choosing stake lengths so the fixtures remain visible above the snowline.
Numbered design sequence:
- Sketch your property to scale, marking all hardscape edges, trees, and architectural features.
- Mark your front entry and primary walkway first, then secondary paths.
- Identify any dark corners near gates, garages, or side yards that could create security vulnerabilities.
- Add accent or uplighting positions for trees, columns, or façade features.
- Count total fixtures per circuit to avoid overloading a single line.
- Note the location of existing GFCI outlets and estimate cable runs.
For a detailed overview of the installation process, the outdoor lighting installation guide covers technical requirements for Calgary properties specifically. If you are upgrading exterior lights from an older system, assess whether existing wiring meets current specifications before reusing it.
| Lighting layer | Visual effect | Best placement |
|---|---|---|
| Uplighting | Dramatic, architectural | Trees, pillars, façade features |
| Downlighting | Natural, soft fill | Overhead pergola, eaves, tall posts |
| Path lighting | Guiding, welcoming | Walkways, driveway edges |
| Accent lighting | Focused, detail-oriented | Stonework, sculptures, water features |
Pro Tip: Aim your uplight fixtures slightly off-centre when illuminating trees. Dead-centre uplighting creates a flat, artificial look. A slight angle reveals texture and produces natural-looking shadows across the bark.
Step-by-step outdoor light installation
With your lighting design mapped out, you're ready to begin the physical installation, step by step, with Calgary's winter safety firmly in mind.
- Mark all fixture positions with stakes before digging or drilling anything. Walk the layout at dusk to see how the spacing actually feels in low light.
- Run your cable routes in conduit wherever possible, especially for any buried runs. In Calgary, bury cables at least 450 mm below grade to protect them from frost heave. Use conduit even for short runs near the surface.
- Mount fixtures and make initial connections using weatherproof wire nuts or compression connectors. Wrap every junction in self-amalgamating tape.
- Install or verify your GFCI outlet. Every exterior circuit must be GFCI-protected. Winter electrical safety requires checking GFCI outlets, protecting wiring, and complying with local codes. Test your GFCI before connecting any fixtures by pressing the "Test" button and confirming the outlet goes dead, then reset it.
- Check snow and ice clearance around all ground-level fixtures. Leave enough stake height above the expected snowpack so fixtures remain visible and unobstructed throughout winter.
- Power on and do a full circuit walk in the dark to check for dead fixtures, unexpected glare, or missed dark corners.
Before installing any new exterior circuit or modifying existing wiring, confirm that your work complies with the current Alberta Electrical Utility Code. When in doubt, consult a licenced electrician. This is especially important for any circuit near water features, in-ground fixtures, or areas subject to snow melt runoff.
Good installation habits contribute directly to boosting curb appeal year-round. For a handy reference during installation, the Calgary lighting checklist covers every stage from rough-in to final test.
Colour temperature and controls for Calgary homes
Now that the fixtures are installed, fine-tuning the experience with the right colour temperature and smart controls is the final touch that separates a merely functional system from one that genuinely transforms your property.
Colour temperature is measured in Kelvin (K). Lower numbers produce warm, amber-toned light. Higher numbers shift toward cool, blue-toned white. Warm white at 2700K to 3000K is ideal for curb appeal, while cooler whites suit task and security applications.
Choosing the right temperature by scenario:
- Entrances and garden beds: 2700K to 3000K warm white creates an inviting, cosy glow that flatters both landscaping and architectural finishes.
- Driveways and garages: 3500K to 4000K neutral white provides enough contrast for parking safely without looking clinical.
- Security floodlights: 4000K to 5000K cool white maximises visibility and creates a sharp, alert look that deters intruders.
- Pathway lights: 2700K to 3000K keeps pathways welcoming rather than institutional.
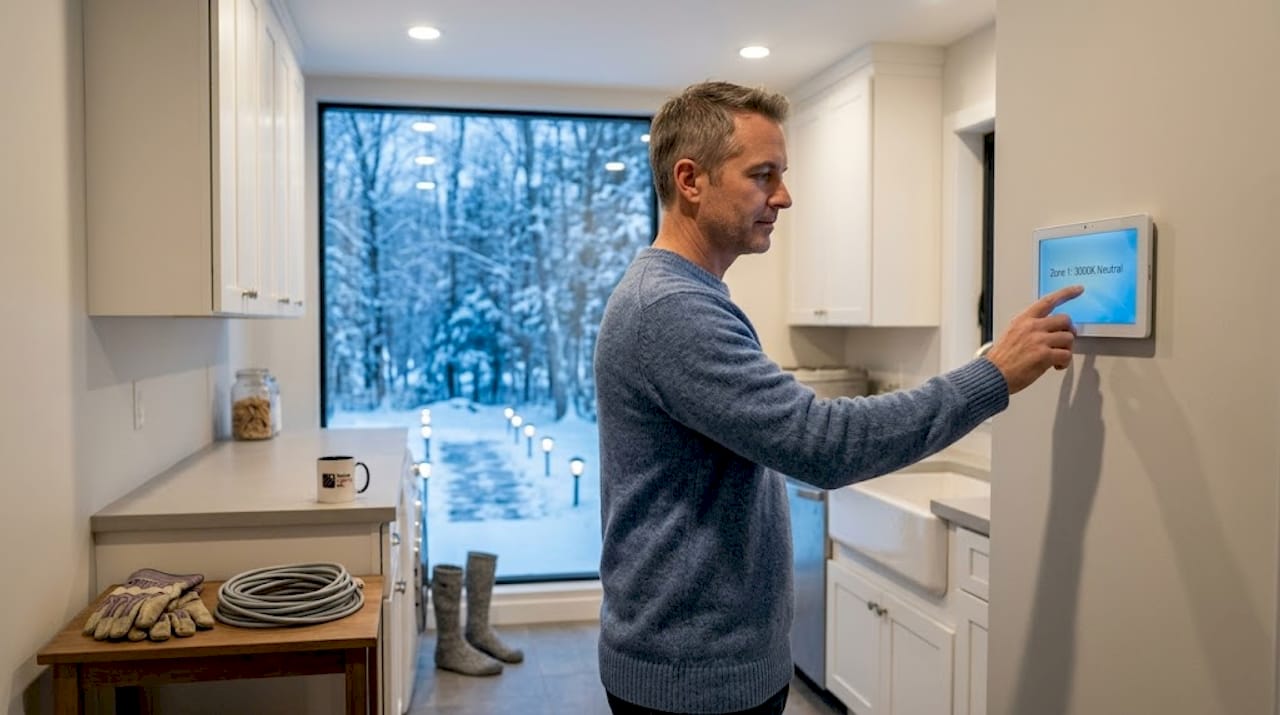
Controls make the system work for you, not the other way around. A basic timer is a good starting point, keeping lights on predictable schedules and reducing energy waste. Dawn/dusk sensors are a significant upgrade because they adjust automatically to Calgary's dramatic seasonal shifts in daylight hours. From a long June evening to a dark December afternoon, the sensor does the thinking for you.
App-based controls, such as those offered through modern permanent LED systems, take this further. You can dim zones for a relaxed evening on the deck, set holiday colour effects with a few taps, or trigger motion-activated security brightness remotely. For a full walkthrough of setting these systems up, the outdoor lighting control setup guide is a practical resource.
Pro Tip: If you plan to add seasonal or holiday lighting effects, choose a system with native colour-changing capability from the start. Retrofitting colour control to a fixed-white system is expensive and often impossible without replacing fixtures entirely.
Common issues and maintenance for lasting results
Ongoing performance and safety come from addressing common failure points before they become problems, and committing to a regular maintenance routine.
The three most common winter failure points:
- Moisture ingress at connections. Water finds every imperfect seal, freezes, expands, and destroys the connection from the inside out.
- Frost heave shifting ground fixtures. Calgary's freeze-thaw cycle moves soil significantly. Freeze-thaw damage often originates from water management issues near installations, which causes fixtures to tilt or pull wiring loose.
- Snow load on overhead or wall-mounted fixtures. Heavy wet snow accumulates on horizontal surfaces. If your fixture's mounting wasn't designed to bear that weight, the bracket will loosen over time.
Routine inspection checklist:
- Early November: Check all connections and reseal any that show signs of moisture. Verify GFCI function.
- After the first major snowfall: Walk the full system and straighten any path fixtures shifted by ploughing or snow settlement.
- January and February: Check for ice damming around buried conduit exit points. Clear snow from wall-mounted fixtures manually if needed.
- Late March (thaw season): Inspect all ground-level fixtures for heave damage and retest every circuit.
Pro Tip: Keep a simple photo log of your fixture positions each autumn. After winter, that log makes it immediately obvious which fixtures have shifted, making inspection faster and more accurate.
For specific failure scenarios and how to address them, lighting troubleshooting covers Calgary-specific issues in detail. Build the habit of regular lighting checks into your seasonal home maintenance schedule the same way you would inspect your gutters or furnace.
What most outdoor lighting advice misses in Calgary
Most guides treat outdoor lighting as a universal topic with a few cold-weather footnotes. That approach underserves Calgary homeowners significantly.
Here is the honest truth: the cold temperature rating on a fixture is nearly meaningless on its own. Cold-rated LEDs frequently fail due to moisture ingress, not the cold itself, which means that inspection and sealing discipline matters far more than spec-sheet numbers. We have seen beautifully spec'd, expensive fixtures fail within a single winter because the installer wrapped connections loosely or used standard electrical tape instead of proper weatherproof materials. The fixture survived the cold. The connection did not.
The second thing most guides miss is the hazard of over-lighting pathways. More light is not automatically better. Pathway lighting is designed to define and guide, not to flood an area with floodlight-level brightness. When you overdo path lighting, the glare actually reduces visible contrast, making edges and steps harder to distinguish, not easier. This is the opposite of what most homeowners intend.
The practical answer is shielded, directional fixtures placed at the right intervals. A shielded path light directs its beam downward onto the walking surface, where it is needed, rather than scattering light into visitors' eyes. This produces a far safer result and a far more attractive aesthetic, especially when viewed from inside the house or from the street.
For Calgary specifically, the investment in long-lasting lighting success comes from treating the whole system, including its weatherproofing, controls, and inspection schedule, as a single integrated project rather than a collection of individual fixtures.
Upgrade your Calgary home with permanent lighting
You now have the knowledge to design, install, and maintain an outdoor lighting system that holds up through Calgary's toughest conditions. But knowing the steps and executing them with precision are two very different things.

At Starise Lighting, we specialise in permanent LED lighting systems built specifically for Calgary's climate. Our Gen 2 24V LED systems use cold-rated, weatherproof construction with app-based control, so you can manage colour, brightness, and scheduling from your phone. There are no seasonal takedowns, no bulb replacements, and no annual reinstallation hassles. Visit co-starise.com to request a free quote, explore our fixture options, and find out how a permanently installed system can transform your property's curb appeal and security from the very first night.
Frequently asked questions
How far apart should outdoor path lights be placed?
Space path lights 6 to 8 feet apart for even, inviting illumination along walkways, avoiding both runway-style spacing and dark gaps between fixtures.
What is the best lighting colour temperature for Calgary homes?
Warm white at 2700K to 3000K is ideal for curb appeal and welcoming entryways, while cooler whites in the 4000K to 5000K range work best for security and task lighting.
How do I winter-proof my outdoor lighting in Calgary?
Protect all wires and connections from snow and ice using weatherproof fixtures and compression-fit junction boxes, and inspect the full system after the first major freeze each season.
Can outdoor LEDs fail during Calgary winters?
Yes. Cold-rated LEDs often fail from moisture intrusion rather than temperature, so proper sealing during installation and regular inspections are the most important reliability factors.