TL;DR:
- Effective landscape lighting combines layered fixture types, proper beam angles, and sufficiently sized transformers to enhance safety and visual appeal. Proper placement, aiming, and concealment of fixtures create depth and a seamless glow, avoiding clutter and glare. Using warm color temperatures around 2700K further ensures a welcoming outdoor atmosphere after dark.
Landscape lighting is defined as the planned use of outdoor fixtures to enhance a property's safety, security, and visual appeal after dark. The best examples of landscape lighting combine pathway lights for safe navigation, uplights to dramatise trees and architecture, and accent fixtures that frame garden focal points. Each fixture type serves a distinct role, and understanding those roles is what separates a well-lit property from a cluttered one. This article walks you through every major technique, with practical guidance on fixture choice, beam angles, transformer sizing, and layered design so you can make confident decisions for your own outdoor space.
1. Examples of landscape lighting: pathway lights
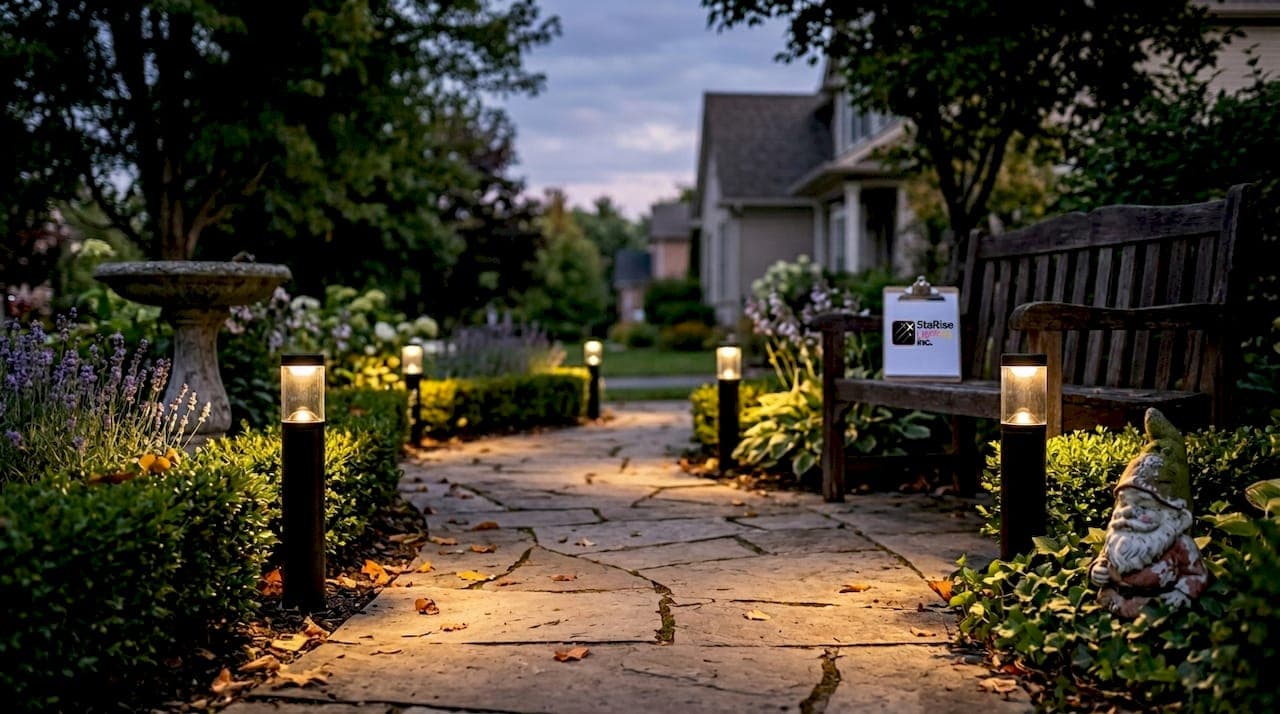
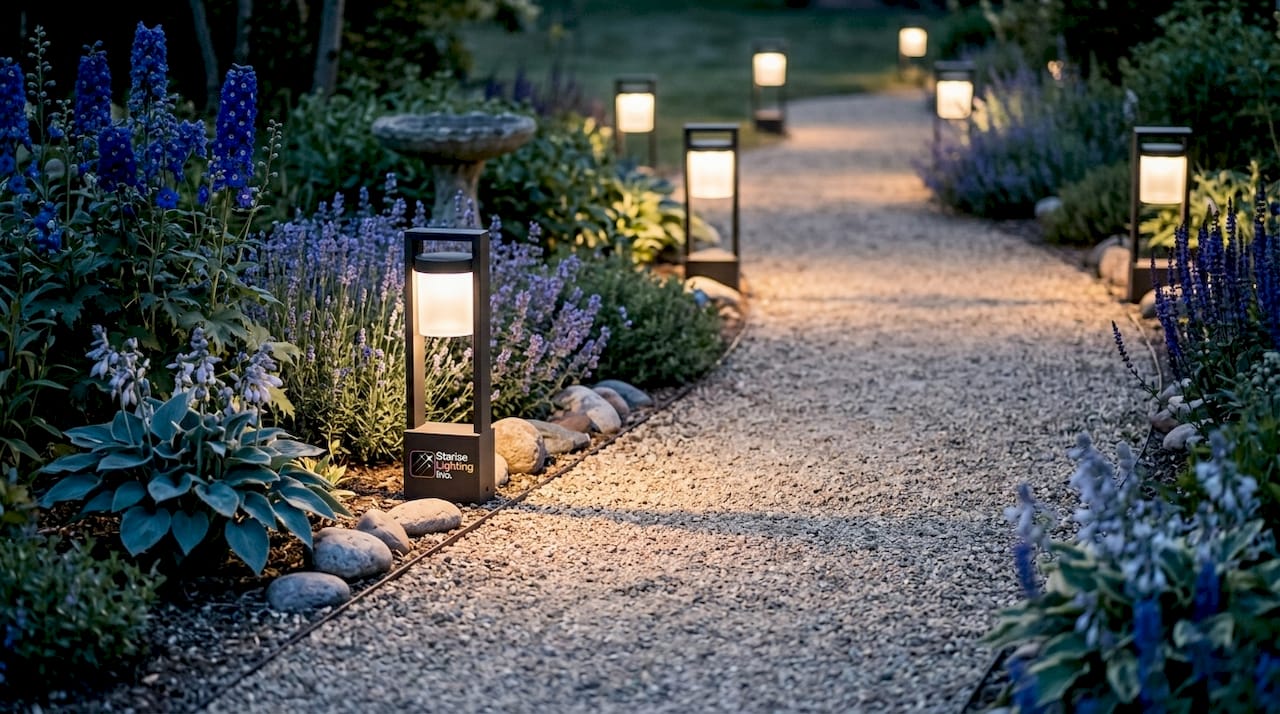
Pathway lighting is the most widely used form of residential outdoor lighting, and for good reason. Path fixtures installed 12 to 24 inches high with gentle downward or side light guide foot traffic safely without blinding anyone walking toward them. The low mounting height keeps the light source close to the ground, which is exactly where you need illumination on a garden path or driveway edge.
Spacing matters as much as height. A gap of roughly 5 to 7 feet between fixtures produces even coverage without creating a runway effect. Staggering fixtures on alternating sides of a path looks more natural than a perfectly symmetrical line, and it suits curved or irregular garden layouts far better.
- Choose warm colour temperatures around 2700K for soft, intimate light that flatters planting and stonework
- Use low-glare shielded fixtures so the light source itself stays hidden from eye level
- On stairs and changes in grade, add a fixture at each step or landing for safety
- Avoid over-lighting: one fixture every 6 feet is usually sufficient for a residential path
Pro Tip: Select fixtures with a frosted or louvred lens rather than a clear one. Clear lenses create hot spots of glare that make the surrounding garden look darker by contrast, which defeats the purpose of path lighting entirely.
2. Uplighting trees and architectural features
Uplighting is the technique of placing fixtures at ground level and aiming them upward to illuminate trees, walls, columns, or other vertical elements. The result is dramatic without being harsh, and it adds genuine depth to a garden that flat, downward-only lighting cannot achieve.
Beam angle is the critical variable in uplighting. Narrow beams of 10 to 15 degrees work well for tight accent work on a single trunk or a narrow architectural column. Wider beams of 30 to 60 degrees spread light across a tree canopy or a textured masonry wall, producing a softer, more even wash. Using the wrong beam angle for the target is one of the most common mistakes in residential lighting design.
- Well lights sit flush with the ground and are ideal for high-traffic areas where a protruding fixture would be a hazard
- Spotlights on adjustable stakes work well for planting beds where you may want to reposition fixtures as plants grow
- Uplighting a large deciduous tree from two or three angles prevents flat, one-dimensional shadows
- Architectural columns respond well to a single narrow-beam fixture placed close to the base
Pro Tip: Never uplight a tree from directly below the trunk. Position the fixture 1 to 2 feet away from the base and angle it at roughly 45 degrees. This creates shadow and texture in the canopy rather than a flat cone of light.
3. Wash lighting for walls and garden beds
Wash lighting uses wide-beam fixtures to spread light evenly across a broad surface, such as a garden wall, a hedge, or a planting bed. Where spotlights create drama through contrast, wash lights create atmosphere through evenness. The two approaches work best when used together rather than in isolation.
Path lights handle the ground plane while uplights and well lights address the vertical plane, and wash lights fill the middle ground between the two. A rendered garden wall lit with a warm wash becomes a glowing backdrop that makes every plant in front of it stand out. This layered approach is what professional designers mean when they talk about three-dimensional outdoor lighting.
The fixture position for wall washing matters. Mounting a wash light too close to a wall produces a scalloped pattern of bright spots rather than an even spread. Pulling the fixture 2 to 3 feet away from the surface and aiming it at a shallow angle produces the smooth, even coverage that makes wash lighting so effective.
4. Fixture types and lighting layers compared
Understanding the difference between fixture types prevents the most common residential lighting mistake: buying the wrong tool for the job. The table below summarises the three main fixture categories and their typical applications.
| Fixture type | Beam angle | Mounting | Best used for |
|---|---|---|---|
| Path light | 90 to 180 degrees | Stake or surface | Walkways, driveways, garden edges |
| Wash light | 60 to 120 degrees | Stake, wall, or ground | Garden beds, walls, hedges |
| Spotlight or uplight | 10 to 60 degrees | Stake, well, or surface | Trees, columns, focal points |
Layered lighting using ambient, accent, and task lighting reduces glare and improves both beauty and function. Ambient light provides the soft background glow that makes a garden feel inhabited rather than staged. Accent lighting draws the eye to specific features. Task lighting ensures safe movement. A garden that uses only one of these layers will always feel either flat or harsh.
The practical rule is to start with task lighting (paths and stairs), add ambient lighting (wash lights and general garden glow), and finish with accent lighting (uplights and spotlights on focal points). This sequence prevents over-lighting and keeps the design coherent.
5. System planning: transformer sizing and zone layout
A landscape lighting system is only as reliable as its power supply. Transformer sizing involves totalling fixture wattage by zone and adding a 10 to 20 percent capacity buffer, and residential low-voltage transformers typically range from 150W to 600W. Undersizing a transformer is the single most common cause of dim fixtures and premature LED failure.
Here is a straightforward planning sequence for a typical residential property:
- List every fixture and its wattage. Modern LED path lights typically draw 3 to 5W each; LED spotlights draw 5 to 15W.
- Group fixtures into zones by location: front pathway, rear garden, and driveway, for example.
- Total the wattage for each zone and add 15 percent as a buffer.
- Choose a transformer with enough capacity to cover all zones simultaneously, or use a multi-zone transformer with separate ports for each circuit.
- Keep cable runs under 100 feet per zone where possible to minimise voltage drop.
Zone planning groups fixtures by cable run and wattage for optimal performance and easier troubleshooting. A multi-zone transformer lets you control pathways, uplights, and accent lights on separate schedules, which is particularly useful for security lighting that needs to stay on later than decorative fixtures.
Pro Tip: Buy a transformer rated at least 25 percent above your calculated load. Gardens grow, and you will almost certainly want to add fixtures over time. Replacing an undersized transformer is far more disruptive than buying the right size from the start.
For more detail on low-voltage system planning tailored to Canadian properties, including wattage calculations and expansion strategies, the Co-starise blog covers the topic thoroughly.
6. Security lighting examples that actually work
Security-oriented outdoor lighting is most effective when it is integrated into the overall design rather than bolted on as an afterthought. Well-lit stairways, pond areas, walkways with motion sensors, and perimeter path lighting all contribute to a safer property without creating the harsh, institutional look of floodlights on a timer.
Motion-activated fixtures work best when placed at entry points: gates, garage approaches, and side passages. The key is to position them so the motion zone covers the approach, not just the immediate area in front of the fixture. A sensor that triggers only when someone is already at your door provides almost no deterrent value.
Perimeter path lighting serves double duty. It guides guests safely while making the property perimeter visible from inside the house. Combining low-level path lights with a mid-height motion-activated spotlight at each corner of the property covers both functions without requiring a separate security lighting system.
7. Integrated lighting: the case for concealed fixtures
The most sophisticated examples of residential outdoor lighting hide the hardware entirely. A 2026 case study of a coastal residence used 158 outdoor fixtures concealed within planting beds, masonry, and architectural details, combining multiple fixture shapes to create a seamless design where light appeared to come from the garden itself rather than from visible hardware.
This approach is achievable on a homeowner budget at a smaller scale. The principles are the same regardless of property size:
- Bury well lights flush with the ground in planting beds so only the light is visible, not the fixture
- Tuck stake-mounted spotlights behind low shrubs or ornamental grasses to hide the body of the fixture
- Use fixtures in varying shapes (directional, flush, and recessed) across a single property to suit different surfaces and planting types
- Conceal fixtures within landscape elements to avoid fixture clutter and let the light itself define the space
The result is a garden that looks professionally designed because the eye is drawn to the illuminated plants and surfaces rather than to the hardware producing the light. This is the difference between a garden that is lit and a garden that glows.
For inspiration on how integrated residential lighting translates to real properties, including concealed fixture layouts and layered design examples, the Co-starise blog offers detailed case studies.
Key takeaways
Effective landscape lighting combines layered fixture types, correct beam angles, and properly sized transformers to produce outdoor spaces that are both beautiful and safe.
| Point | Details |
|---|---|
| Layer your lighting | Combine ambient, accent, and task lighting to avoid glare and create depth. |
| Match beam angle to purpose | Use 10 to 15 degrees for tight accents and 30 to 60 degrees for canopies or walls. |
| Size transformers generously | Add a 15 to 25 percent buffer above your calculated load to allow for future expansion. |
| Conceal fixtures where possible | Hidden hardware keeps the focus on illuminated surfaces rather than on equipment. |
| Use warm colour temperatures | Lighting at 2700K or lower produces a comfortable, flattering outdoor atmosphere. |
What I have learned from watching homeowners light their gardens
Most homeowners I speak with make the same two mistakes. They buy too many fixtures and they aim them all at the same height. The result is a garden that looks busy during the day and blinding at night, with no sense of depth or hierarchy.
The properties that genuinely impress are almost always the ones that use fewer fixtures, placed more deliberately. A single well-aimed uplight on a mature tree does more for a garden's atmosphere than six path lights crammed along a 10-metre walkway. Restraint is the hardest design principle to sell, but it is the one that separates a good lighting scheme from a great one.
I also think Canadian homeowners underestimate how much the colour temperature of their fixtures matters. Warm light at 2700K reads as welcoming and natural against snow and stone. Cooler light at 4000K or above looks clinical in a residential setting, particularly in winter when the contrast between the cold exterior and the warm interior is already stark. Choosing the right colour temperature costs nothing extra and changes everything about how a property feels after dark.
My honest recommendation is to invest in the transformer first. Get a unit with more capacity than you think you need, plan your zones carefully, and then add fixtures gradually as you learn how the light behaves across seasons. A garden lit in August looks completely different in November when the leaves are down and the structure of the planting is exposed. Give yourself room to adapt.
— Starise
Bring your lighting ideas to life with Co-starise

Co-starise specialises in permanent outdoor LED lighting for residential properties in Calgary and Edmonton, using Gen 2 24V LED technology built to perform through Canadian winters. The systems are installed once, controlled through an app, and designed to enhance curb appeal, security, and home value without ongoing maintenance. If you have been inspired by the landscape lighting ideas in this article and want to see what a permanent, professionally designed system looks like on a property like yours, Co-starise offers custom quotes and detailed consultations. Explore the Starise system for Calgary to see how the technology works and what it can do for your home's exterior.
FAQ
What are the main types of landscape lighting fixtures?
The main types are path lights, uplights, well lights, wash lights, and spotlights. Each serves a distinct role: path lights guide foot traffic, uplights dramatise vertical features, and wash lights spread even coverage across broad surfaces.
How far apart should pathway lights be spaced?
Path lights spaced roughly 5 to 7 feet apart provide even coverage without creating a runway effect. Staggering fixtures on alternating sides of the path produces a more natural appearance than a symmetrical line.
What colour temperature is best for garden lighting?
Warm colour temperatures around 2700K produce soft, intimate light that flatters planting, stonework, and architectural surfaces. Cooler temperatures above 4000K tend to look harsh and clinical in residential outdoor settings.
How do I size a transformer for landscape lighting?
Total the wattage of all fixtures by zone, then add a 10 to 20 percent buffer. Residential low-voltage transformers typically range from 150W to 600W, and buying above your calculated load leaves room for future fixture additions.
Can landscape lighting improve home security?
Yes. Motion-activated path and perimeter lighting at entry points, stairways, and walkways deters intruders and improves visibility for residents. Security lighting works best when integrated into the overall design rather than added as a separate system.