TL;DR:
- Permanent LED lighting in Calgary offers year-round curb appeal and enhanced security by eliminating seasonal hassles. Proper professional installation ensures durability against harsh weather, while maintenance and troubleshooting are simplified for long-term performance. DIY approaches risk water ingress and voided warranties, making professional setup the smarter choice for Calgary's extreme climate.
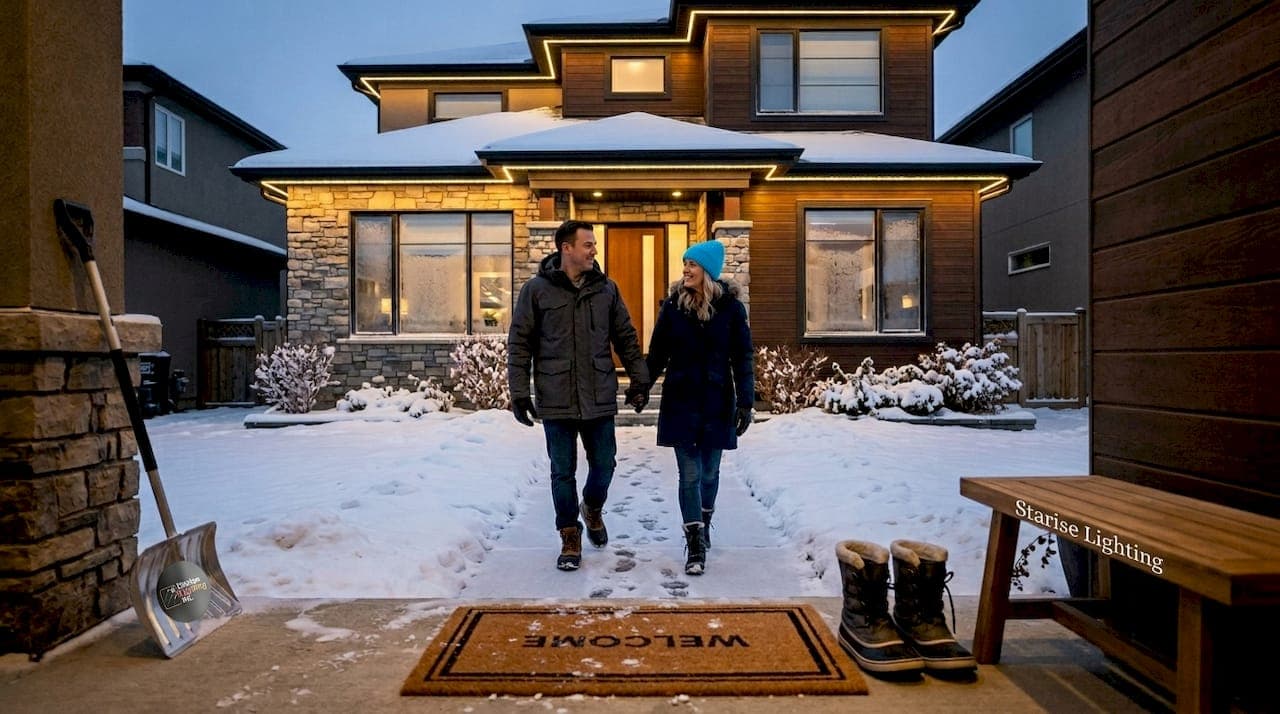
Every autumn, the same ritual plays out across Calgary neighbourhoods: ladders against frozen eaves, tangled cords, burnt-out bulbs, and the sinking feeling that you'll repeat all of it come spring. Seasonal lighting is a hassle that costs you time and money year after year. Permanent LED lighting solves this completely. Installed once to a professional standard, these systems are engineered for Calgary's brutal freeze-thaw cycles, deliver year-round curb appeal, and add a meaningful layer of home security without a single November climb up the ladder.
Table of Contents
- How permanent LED lighting enhances curb appeal and security
- What you need before you start: Tools, materials, and code considerations
- Step-by-step installation: Planning, wiring, and mounting
- Troubleshooting and getting the most from your LED system
- Why DIY isn't always the right choice for Calgary's harsh conditions
- Ready to upgrade your Calgary home with permanent LED lighting?
- Frequently asked questions
Key Takeaways
| Point | Details |
|---|---|
| Weatherproof hardware matters | Choose fixtures and connectors with high IP ratings and frost resistance to withstand Calgary winters. |
| Safety comes first | Always use GFCI outlets and follow code recommendations for low-voltage outdoor lighting installations. |
| Plan before you wire | Proper layout and marked runs reduce installation errors and ensure full home coverage. |
| Connections are critical | Protect every connector and junction from moisture because most outdoor LED failures happen here. |
| DIY or hire a pro | Weigh costs and risks carefully—Calgary’s climate often rewards professional installation for peace of mind. |
How permanent LED lighting enhances curb appeal and security
Walk past any Calgary home fitted with permanent LED eave lighting on a winter evening and the effect is immediate. Warm light traces the roofline, highlights architectural features, and gives the property a polished, intentional look that seasonal strings simply cannot match. This is not just aesthetics. It is an upgrade that works for you 365 nights a year.
Permanent LED systems installed on Calgary homes typically use Gen 2 24V LED technology mounted discreetly along eaves, soffits, and fascia boards. The fixtures sit flush and nearly invisible during daylight hours. At night, they transform your home's exterior with programmable colour, brightness, and animated effects controlled through a smartphone app. Holiday seasons, sports nights, or just your everyday preference — you choose the look from your couch.
The curb appeal and security benefits go well beyond looks. A well-lit exterior eliminates the dark corners that make a property vulnerable. Motion-responsive modes and consistent lighting across entry points actively deter opportunistic break-ins. Insurance brokers consistently note that visible exterior lighting is one of the simplest deterrents a homeowner can install.
Key reasons Calgary homeowners are switching to permanent LED systems:
- No annual re-installation on frozen ladders or icy roofs
- Weatherproof construction handles temperatures from -40°C through summer heat
- Energy-efficient LEDs use a fraction of the power that incandescent seasonal strings consume
- Full-colour customisation for every holiday, season, or occasion
- Consistent, professional appearance that seasonal lights cannot replicate
- Security-focused lighting modes that run automatically on a schedule
"Permanent LED lighting systems engineered for Calgary's climate are designed to operate around -40°C, with professional installation typically completed in one to three days depending on roof size and complexity."
The durability factor is what separates permanent systems from anything you buy at a big-box store in November. These are commercial-grade fixtures built to stay outside permanently, not plastic clips rated for a few seasons of moderate weather.
What you need before you start: Tools, materials, and code considerations
A smooth installation starts well before the first drill hole. Calgary's climate and electrical code requirements mean cutting corners on materials or safety practices creates real risk, both to the system's longevity and to your home's safety.
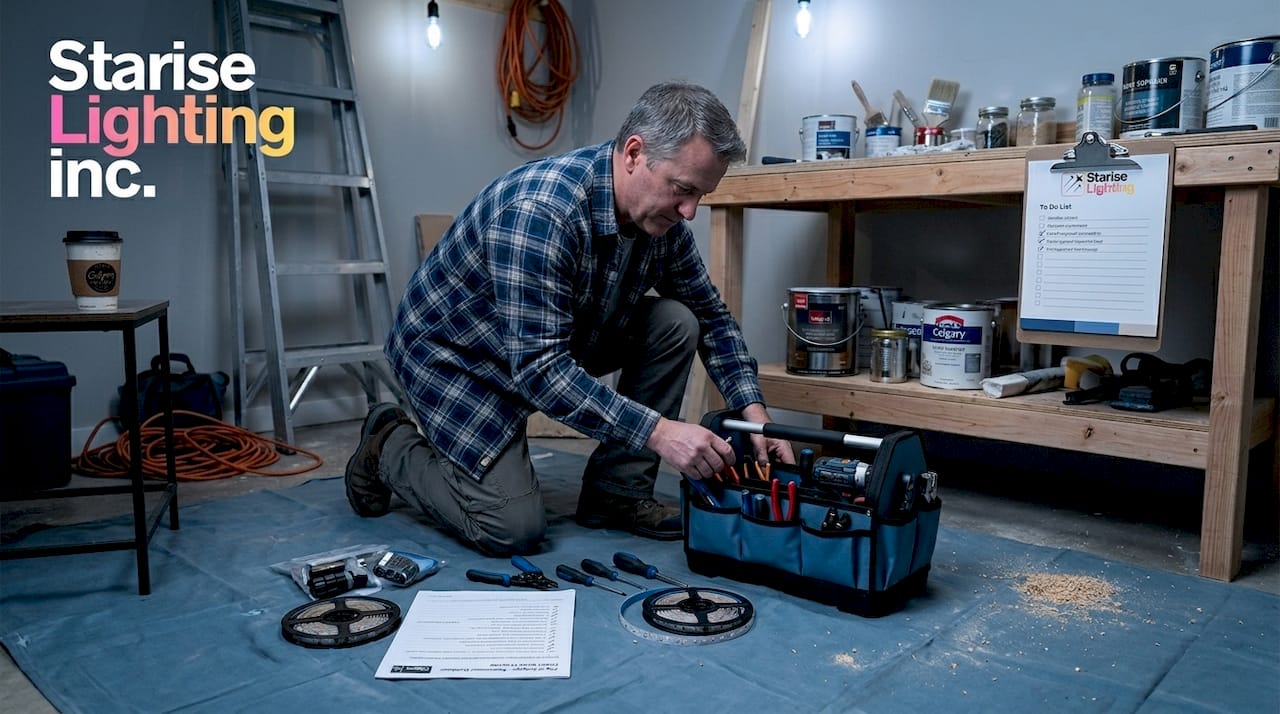
Essential tools, materials, and safety gear
| Category | Items needed |
|---|---|
| Tools | Cordless drill, hole saw bits, fish tape, wire stripper, voltage tester, ladder |
| Fixtures and hardware | IP65+ rated LED fixtures, frost-rated mounting clips, UV-resistant wire |
| Electrical components | GFCI-protected outlet, weatherproof in-use cover, low-voltage transformer |
| Safety gear | Non-slip boots, safety glasses, work gloves, a spotter for ladder work |
| Fasteners and sealing | Exterior-grade screws, silicone sealant rated for -40°C |
What to look for in fixtures for a Calgary climate:
- IP65 or higher rating, confirming the fixture is fully dust-tight and protected against water jets
- Operating temperature rating confirmed to at least IP65 waterproof, -40°C to +50°C to survive both January cold snaps and July heat
- UV-stabilised housing that will not crack or fade under intense Alberta sunlight
- Corrosion-resistant metals or high-grade polycarbonate housing for longevity
The electrical side demands equal attention. One detail many homeowners overlook is the transformer connection point. Your low-voltage transformer must plug into a GFCI-protected outlet fitted with a weatherproof in-use cover. GFCI stands for ground fault circuit interrupter, a device that instantly cuts power if it detects a dangerous imbalance. In wet or icy conditions, this is not optional. It is a basic safety requirement and often a code requirement in Calgary area installations.
Before you purchase anything, check these items off your list:
- Confirm whether your project requires an electrical permit from the City of Calgary
- Identify whether existing exterior outlets are GFCI-protected and weatherproof
- Review the LED installation checklist to ensure nothing is missed at the planning stage
- Understand the low voltage safety tips that apply to your specific setup
Pro Tip: Do not assume an existing outdoor outlet is GFCI-protected just because it is outside. Many older Calgary homes have standard outlets on the exterior. Test with a voltage tester or have an electrician verify before connecting any new system.
Permitting requirements vary based on project scope. Replacing fixtures on an existing circuit often does not require a permit, but adding a new circuit or sub-panel for a larger system almost certainly does. When in doubt, a quick call to the City of Calgary's development and building approvals department takes minutes and can save you significant trouble later.
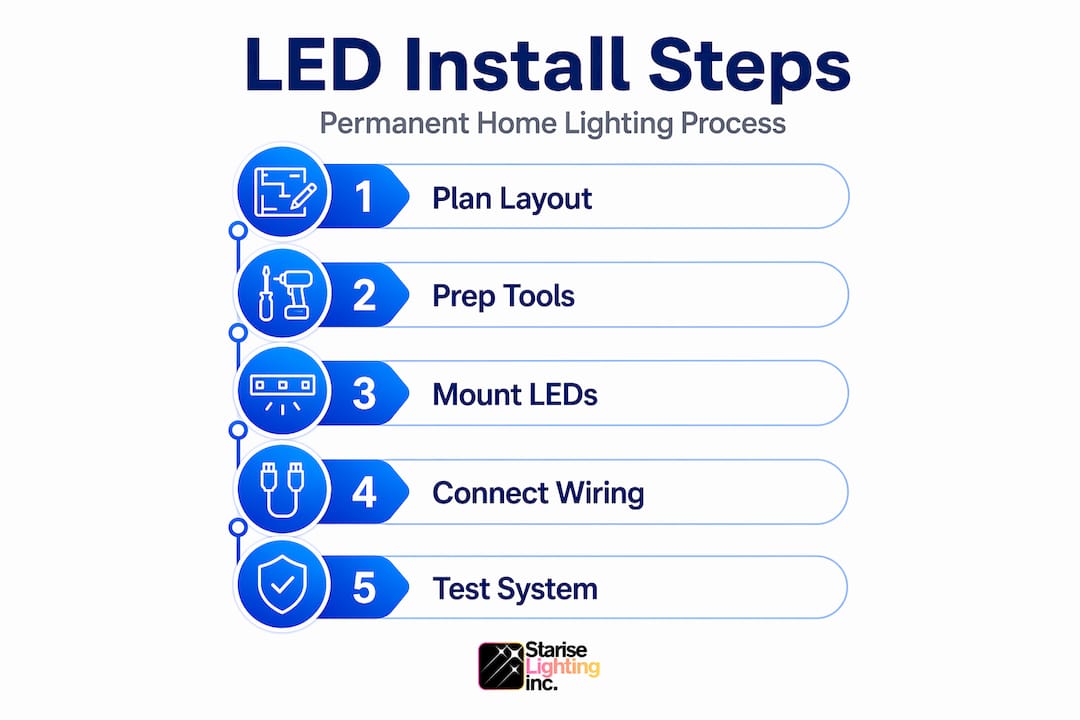
Step-by-step installation: Planning, wiring, and mounting
With your materials assembled and safety requirements confirmed, the actual installation follows a logical sequence. This is where careful planning pays off. A rushed layout creates hot spots, gaps in coverage, and mounting holes in the wrong places.
The installation process, step by step
-
Sketch your layout first. Walk the exterior and mark where fixtures will sit, noting spacing for even coverage. Photograph each section of roofline or fascia for reference. Plan your wire routing before any drilling begins.
-
Mark your mounting points. Use a chalk line or pencil to mark consistent spacing along eaves or fascia boards. Standard spacing for eave-mounted LED systems is every 30 to 60 centimetres, depending on fixture brightness and the look you want.
-
Drill your mounting holes carefully. Use the correct bit size for your fixture clips. Apply exterior-grade silicone around each hole before inserting clips to prevent water from tracking behind the fascia board.
-
Route your wiring. Follow the principle of planning the layout, using conduit where wire runs are exposed, and routing conduit safely through any areas that require protection, particularly when runs travel down from eaves to a transformer location. In Calgary, buried cable runs must account for frost depth.
-
Mount your fixtures. Snap or screw fixtures into their clips. Ensure each one seats firmly and that no gap exists between the fixture and its mounting surface.
-
Make your connections. Use weatherproof connectors at every junction. Avoid standard wire nuts outdoors. Direct-burial-rated or gel-filled connectors are the correct choice. Double-check every connection for a firm, watertight seal.
-
Connect to the transformer. Follow safe connection methods for transformer wiring. Ensure the transformer is mounted at least 30 centimetres off the ground to avoid snow accumulation and plugged into your GFCI outlet with a weatherproof cover.
-
Test thoroughly before finishing. Power on the system and walk the entire perimeter. Check for flickering, dark sections, or loose connections before closing up any junction points.
DIY vs. professional installation: A quick comparison
| Step | DIY approach | Professional approach |
|---|---|---|
| Layout planning | Homeowner measures and sketches | Technician performs site assessment |
| Mounting and drilling | Homeowner drills, seals, mounts | Crew uses calibrated spacing tools |
| Wiring and connections | Homeowner follows guide, self-checks | Certified electrician verifies all joints |
| Code compliance | Homeowner researches requirements | Installer handles permits and inspections |
| Warranty coverage | Limited, based on product only | Full system warranty often included |
| Completion timeline | Several weekends, weather-dependent | One to three days |
Review the full installation workflow to understand what each stage involves before you decide on a DIY or professional approach. The homeowner installation guide provides additional guidance tailored to Calgary-specific conditions.
Pro Tip: If your installation involves any work inside your electrical panel, running new circuits, or adding a dedicated outlet, hire a licensed electrician for that portion. The rest of the eave and fixture work you may be comfortable doing yourself, but the panel work is not a DIY task.
Troubleshooting and getting the most from your LED system
Even a well-installed system can develop issues over time, particularly after Calgary's first hard winter. Knowing where problems typically originate saves you from expensive service calls and keeps your lighting looking its best year-round.
Common issues and how to address them:
- Flickering sections: Usually caused by a loose connection at a junction point. Turn off power, locate the nearest connector in the affected run, and check for a secure seal.
- Dark segments: Often a tripped controller zone or a failed connector. Check your app or controller first, then inspect the physical run for visible damage.
- Power loss to the whole system: Check whether your GFCI outlet has tripped. Press the reset button on the outlet. If it keeps tripping, moisture may have entered a connector or the transformer may be failing.
- Controller or app not responding: Most smart LED controllers can be reset to factory settings. Check for firmware updates through the app before assuming a hardware fault.
- Colour inconsistency across sections: Often a sign of voltage drop over a long run. This may require adding a second transformer or repositioning your power injection point.
Simple maintenance tasks every Calgary homeowner should do seasonally:
- Inspect all visible connectors for cracking, corrosion, or moisture entry after freeze-thaw cycles in spring
- Clear any ice or heavy snow accumulation from fixture mounting points
- Wipe down accessible fixture faces with a damp cloth to remove grime and road salt residue
- Confirm GFCI outlet function monthly by pressing the test and reset buttons
- Check the app or controller settings after any extended power outage to confirm schedules are still programmed correctly
"Even when the main fixture carries a strong IP rating, connectors and junctions are the most common point of water ingress in outdoor LED systems — waterproof connectors and protected routing are not optional extras."
Comparing permanent vs. temporary lights makes the maintenance advantage of permanent systems obvious. Temporary strings require annual inspection, replacement of failed sections, and re-installation. A permanent system, properly sealed at installation, may go several years between any meaningful maintenance intervention.
LED longevity outdoors is primarily determined by three factors: heat management at the driver level, quality of the waterproofing at every junction, and the initial quality of the diodes themselves. A quality permanent system will outlast any seasonal product by a decade or more with basic attention to the points above.
Why DIY isn't always the right choice for Calgary's harsh conditions
Here is a perspective most guides will not give you plainly. The step-by-step instructions in this article are accurate, and a capable homeowner can absolutely install a permanent LED system. But Calgary's climate is genuinely unforgiving in ways that matter specifically to outdoor electrical work.
The freeze-thaw cycle in Calgary is not just cold. It is mechanical. Water enters a small gap in a connector in October, freezes in November, expands, and by January that connector has been physically forced open. The joint that passed your visual inspection in September is now letting in melt water in April. This is not a failure of the product. It is a failure of installation technique, and it is exactly what the installation best practices are designed to prevent.
Professional installers working regularly in Calgary develop an instinct for these failure points that a first-time installer simply does not have yet. They know which connector orientations shed water rather than collect it. They know where to add a second sealant bead without being told. They have seen what February looks like on a system that was installed with the wrong silicone.
The cost argument for DIY also weakens when you factor in warranty. Many premium permanent LED systems carry full system warranties that are contingent on professional installation. A failed connector you installed yourself may void coverage on components that were otherwise perfectly manufactured. Weigh that against the installation cost before making your decision.
We are not saying DIY is wrong. We are saying that if your goal is a system that looks perfect in five years and never gives you grief in January, professional installation in Calgary's climate is frequently the smarter financial decision.
Ready to upgrade your Calgary home with permanent LED lighting?
If you have worked through this guide, you understand exactly what separates a well-planned permanent LED installation from a seasonal string job. The materials, the safety steps, and the installation sequence all matter.

Starise Lighting specialises in permanent LED lights Calgary homeowners can rely on through every season. Our Gen 2 24V systems are weatherproof, warranty-backed, and installed by a team that works specifically in Calgary's climate. Whether you want a quote for professional installation or want to understand the full system overview before deciding, we make the process straightforward. Reach out today and find out what your home could look like tonight.
Frequently asked questions
What makes permanent LED lighting suitable for Calgary's weather?
Permanent systems use weatherproof fixtures with ratings of IP65 waterproof, -40°C to +50°C and sealed waterproof connectors at every junction, ensuring reliable operation through Calgary's full temperature range.
How long does professional permanent LED installation take?
Most Calgary homes are completed in one to three days, with the timeline varying based on roof complexity, the number of zones, and any electrical upgrade work required.
Can I safely install permanent LED lighting myself?
DIY installation is possible if you use weatherproof-rated components, connect your transformer to a GFCI-protected outlet with a weatherproof in-use cover, and follow local electrical code requirements throughout.
What is the most common point of failure for outdoor LED lighting?
Connectors and junctions are the most frequent failure point, making waterproof connection methods and protected routing the single most important detail to get right at installation.