TL;DR:
- Permanent LED systems offer weatherproof, energy-efficient lighting controlled via smartphone, eliminating seasonal setup.
- Proper hardware rated for -40°C and IP68 standards is essential for Calgary's harsh climate.
- Professional installation ensures long-lasting, aesthetically pleasing, and secure outdoor lighting.
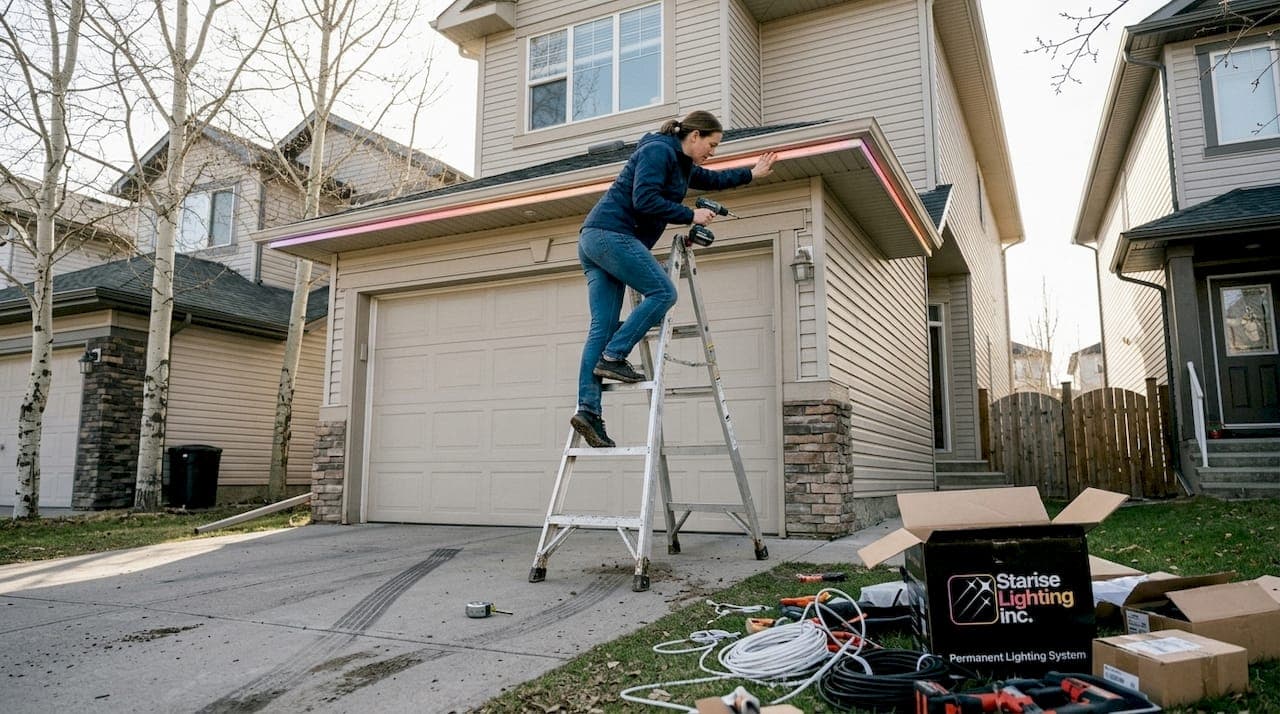
Every autumn, thousands of Calgary homeowners drag out tangled strings of seasonal lights, climb ladders in the cold, and spend hours clipping bulbs to eavestroughs — only to tear it all down six weeks later. It's exhausting, and frankly, it doesn't do much for your home's security or value the other eleven months of the year. Permanent LED lighting systems solve all of that. Installed once and controlled from your phone, they deliver stunning colour effects, improved safety, and real energy savings every single night. This guide walks you through everything you need: materials, layout planning, step-by-step installation, and ongoing maintenance to get the most from your investment.
Table of Contents
- What you need to install permanent LED lighting
- Planning and layout: Mapping your home's lighting scheme
- Step-by-step installation: Safe and effective LED lighting setup
- Troubleshooting, maintenance, and maximising results
- Why permanent LED lighting is a game-changer for Calgary homeowners
- Get expert Calgary installation for guaranteed results
- Frequently asked questions
Key Takeaways
| Point | Details |
|---|---|
| Choose cold-rated hardware | Always select LED systems tested for -40°C and certified for Canadian winters. |
| Plan your layout carefully | Effective design and spacing prevent dark spots and maximize visual impact. |
| Understand permit rules | Low-voltage installs rarely need permits, but hardwired systems do — check City of Calgary regulations. |
| Enjoy security and savings | Permanent LEDs increase property value, boost home safety, and save up to 90% on lighting energy. |
| Regular maintenance matters | Weatherproof connections and routine checks ensure your system lasts for many years. |
What you need to install permanent LED lighting
Having framed the need for a permanent solution, let's identify exactly what's required for a reliable installation. Getting the right materials from the start saves you from costly rework, especially in Calgary's punishing climate.
Essential tools and materials:
- Colour-matched aluminium channels (sized to your soffit profile)
- IP67+ rated LED pucks or nodes (IP68 preferred for Calgary)
- Low-voltage cable (rated for outdoor, direct-burial use)
- A 24V transformer or power supply with GFCI protection
- Mounting clips, end caps, and weatherproof connectors
- Drill, level, measuring tape, and a fish tape or wire snake
- Smartphone-compatible controller with app support
Not all LED hardware is created equal. For a lighting checklist Calgary homeowners should follow, hardware ratings matter enormously. Calgary sees temperatures plunge to -40°C, rapid freeze-thaw cycles in spring, and heavy snow loads on rooflines. For those conditions, you should prioritise IP67 minimum, with IP68 preferred, along with -40°C rated LEDs, 24V systems for voltage drop prevention on long runs, and CSA/ETL/cUL certified hardware.
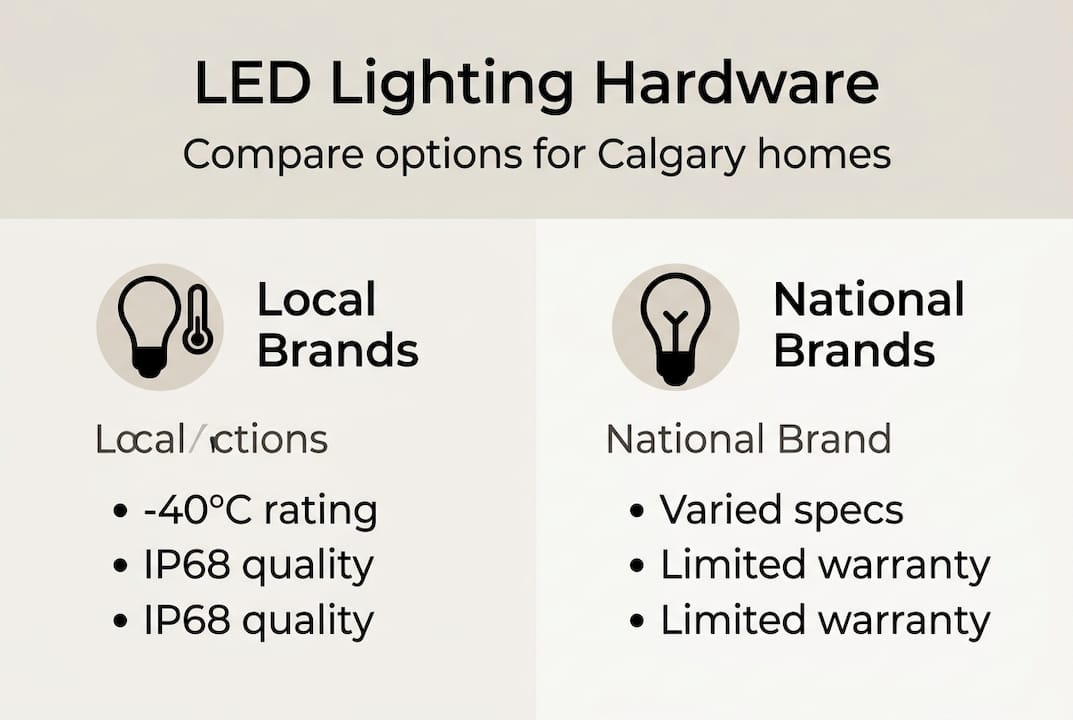
Brand comparison: local vs. national options
| Feature | Local Canadian brands | National brands |
|---|---|---|
| Cold weather rating | -40°C tested | Varies, often -20°C |
| IP rating | IP68 standard | IP65 to IP68 |
| Warranty | Up to 25 years | 2 to 5 years typical |
| Local support | Yes, Calgary-based | Limited regional service |
| Certification | CSA/cUL | ETL/UL (US-focused) |
Local Canadian brands are purpose-built for our winters. National brands often perform well in milder climates but may fall short when Calgary's freeze-thaw cycles stress the seals and connectors.
The 24V system specification is worth understanding. Longer cable runs lose voltage over distance, which causes LEDs at the far end of a run to appear dimmer than those near the power supply. A 24V system cuts that loss in half compared to a 12V system, keeping colours consistent across your entire roofline.
Pro Tip: Sketch your home's perimeter and measure total linear footage before purchasing cable. Add 20% extra length to account for routing through attics, around corners, and down to the power supply. Running short mid-install is a frustrating and avoidable problem.
For homeowners who want to understand how curb appeal and security connect to hardware choices, the quality of your components directly determines how long your system looks and performs like new.
Planning and layout: Mapping your home's lighting scheme
Now that you have your materials, it's time to design a lighting layout that maximises both aesthetics and efficiency. A well-planned layout is the difference between a professional-looking result and a patchy, uneven display.
Step-by-step layout planning:
- Walk your property at night and identify every roofline, entryway, garage edge, and architectural feature worth highlighting.
- Measure total linear footage of each run, noting any corners or breaks.
- Mark your power supply location, ideally near an existing GFCI outlet in the garage or on an exterior wall.
- Decide on channel colour to match your soffit or fascia (white, black, bronze, and cedar are common options).
- Plan puck spacing across each run before ordering.
- Identify cable routing paths through attic space or conduit to keep wiring hidden.
Spacing is one of the most important decisions you'll make. Roofline coverage and spacing guidance recommends mounting colour-matched aluminium channels under soffits and installing IP67+ rated LED pucks at 8 to 9 inch spacing for the smoothest light effects. Tighter spacing produces a more fluid, cinema-quality colour wash. Wider spacing creates visible dark spots between nodes, especially on colour-change effects.
Spacing and effect quality guide:
| Puck spacing | Effect quality | Best use case |
|---|---|---|
| 6 to 8 inches | Excellent, smooth blend | Feature walls, entryways |
| 8 to 9 inches | Very good, recommended | Full roofline runs |
| 10 to 12 inches | Acceptable, minor gaps | Budget installs |
| 12+ inches | Noticeable dark spots | Not recommended |
For lighting for curb appeal that genuinely impresses, the 8-inch standard is the sweet spot between material cost and visual quality.
Entryways deserve special attention. Your front door and garage face are the first things guests and neighbours see. Consider double-density puck placement at these focal points to create a richer, more dramatic effect compared to the side rooflines.

Pro Tip: Use painter's tape to mock up your channel positions on the soffit before drilling. Step back from the street to check alignment and symmetry. A crooked channel is much harder to fix after it's fastened.
A clear installation workflow Calgary plan also helps you sequence the work logically, starting from the power supply and working outward, so you never have to backtrack or re-run cable.
Step-by-step installation: Safe and effective LED lighting setup
With your design mapped, you'll move into the hands-on installation phase, making safety and compliance top priorities. Rushing this stage is the most common source of problems down the road.
Installation steps:
- Mount aluminium channels along soffits using the manufacturer's clips, ensuring they are level and flush against the surface.
- Snap LED pucks into channels at your planned spacing, connecting each node in series according to the wiring diagram.
- Run low-voltage cable from the first puck back through the attic or conduit to your power supply location near a GFCI outlet.
- Connect cable to the transformer and controller, following polarity markings carefully.
- Power on the system and test each zone through the app before sealing connections.
- Apply weatherproof silicone or manufacturer-supplied end caps to all channel openings and connector points.
- Pair the controller with your smartphone app and run a full colour cycle to confirm even light distribution.
The installation process calls for wiring IP67+ rated LED pucks in series to a low-voltage controller, running cable through the attic or conduit to the power supply near a GFCI outlet, then testing app integration and weatherproofing all connections before calling the job done.
Safety note: Never work on live wiring. Always disconnect the transformer before making or adjusting any connections. Use a non-contact voltage tester to confirm circuits are de-energised before touching wires.
Permit requirements are straightforward. Low-voltage installs plugged into an existing GFCI outlet generally do not require a permit, but hardwired or line-voltage systems require a licensed electrician and a City of Calgary homeowner electrical permit.
Pro Tip: Label each cable run with masking tape and a marker before routing through the attic. Once cables are hidden, identifying which run belongs to which zone becomes genuinely difficult without labels.
For additional guidance on keeping your family safe during the process, home safety tips cover electrical precautions specific to residential LED installs. If you want to compare system options before committing, residential lighting solutions reviews the leading choices available to Calgary homeowners in 2026.
Troubleshooting, maintenance, and maximising results
Even with a smooth install, you'll want to ensure ongoing performance and maximum return on your investment. Most issues that arise are preventable with a few smart habits.
Common installation mistakes to avoid:
- Using 12V systems on runs longer than 10 metres, causing visible dimming at the far end
- Spacing pucks beyond 9 inches, creating dark spots in colour-change effects
- Skipping weatherproof end caps, allowing moisture into channels during spring melt
- Routing cable through unprotected exterior walls instead of conduit or attic space
- Connecting too many pucks per run beyond the controller's rated amperage
Routine maintenance checklist:
- Inspect channel end caps and connector seals each spring after freeze-thaw season
- Clear snow and ice buildup from channels during heavy Calgary winters
- Check app firmware updates for your controller twice per year
- Test motion and schedule features monthly to confirm security settings are active
The long-term numbers make permanent LED lighting one of the best home improvement investments available. Quality systems last over 50,000 hours, roughly 17 years at 8 hours per day, and a full-home system uses about the same electricity as one 60W light bulb. That's extraordinary efficiency for a system covering your entire roofline.
On the energy side, LEDs save 75 to 90% compared to halogen equivalents, and IP68-rated systems survive full submersion, which matters when Calgary's spring melt sends water pooling along soffits and eavestroughs. The 8-inch puck spacing also produces noticeably smoother colour effects compared to 9 to 12 inch spacing, reducing the dark spots that make cheaper installs look amateurish.
For enhancing property value, permanent lighting adds a polished, intentional look that seasonal decorations simply cannot replicate. Buyers notice it. Appraisers notice it. And your neighbours will definitely notice it.
Pro Tip: Set up a security schedule in your app that turns the lights on at dusk and off at midnight. This passive deterrent costs nothing extra and makes your home a far less attractive target for opportunistic theft.
Why permanent LED lighting is a game-changer for Calgary homeowners
Here's something most lighting articles won't tell you: the biggest barrier to a great result isn't the installation itself. It's buying the wrong hardware because it looked similar online and cost less.
We've seen homeowners install imported LED systems rated for mild European climates, only to have seals crack and connectors fail after their first Calgary winter. The -40°C rating isn't marketing language. It's a real engineering threshold that separates hardware built for our climate from hardware that merely resembles it.
Local brands like Starise and Celebright offer IP68 ratings, 24V architecture, tight 8-inch spacing standards, and warranty claims up to 25 years. National brands like Gemstone and Trimlight perform well overall but show variable service quality and cold-weather performance. For Calgary specifically, Canadian-made systems built to our climate are the clear choice.
Permanent lighting also eliminates the annual ritual of seasonal installs entirely. That's not a small thing. It's hours of your time, wear on your ladder, and real physical risk every single year. A system installed once, controlled from your phone, that looks better than any seasonal display you've ever put up — that's what choosing the right system actually delivers. The long-term savings, the security benefits, and the professional appearance all compound over time in ways that seasonal lighting simply cannot match.
Get expert Calgary installation for guaranteed results
If you've read this far, you understand what a quality permanent LED system requires. The materials, the planning, the wiring, the weatherproofing — it adds up to a serious project with real long-term rewards.

For homeowners who want the job done right the first time, Starise Lighting offers professional Calgary installations backed by local expertise and genuine cold-climate hardware. Our team handles everything from site assessment to app setup, so you get a flawless result without the ladder work. If you'd like to explore the technology behind what we install, our LED system details page covers the Gen 2 24V architecture, colour options, and weatherproofing specs in full. Request a quote today and see what your home looks like lit up properly.
Frequently asked questions
Do I need a permit to install permanent LED lighting in Calgary?
Most low-voltage systems plugged into a GFCI outlet do not require a permit, but hardwired systems require a homeowner electrical permit from the City of Calgary and a licensed electrician.
How long do permanent LED outdoor lights last?
Top-quality systems last over 50,000 hours, which works out to roughly 17 years at average daily use of 8 hours per night.
Will permanent LEDs work in Calgary's cold winters?
Yes, provided you choose IP67+ rated hardware that is specifically tested to -40°C and certified for Canadian climates.
How much energy do these LED systems use?
A full-home LED system uses roughly the same electricity as a single 60W light bulb, making it one of the most energy-efficient upgrades available.
What's the main benefit over seasonal lights?
Permanent LED lighting delivers all-year curb appeal, active security features, and 75 to 90% energy savings compared to halogen, with none of the yearly installation hassle.