TL;DR:
- A durable outdoor lighting system uses weather-resistant materials, precise installation, and regular maintenance to last over 25 years. Proper planning, quality components rated IP65 or higher, and professional sealing prevent system failure caused by weather and improper setup. Consistent inspections and modular components ensure long-term performance and protect your investment.
A durable outdoor lighting setup is defined as a professionally engineered system using weather-resistant materials, mechanical fasteners, and rated electrical components designed to last 25 or more years. The process for durable lighting setup covers four pillars: material selection, pre-installation planning, precise installation, and scheduled maintenance. Get any one of those wrong and you are looking at sagging wires, corroded fixtures, and a system that fails before the warranty expires. This guide walks you through each stage with the specificity you need to make smart decisions, whether you are hiring a professional or overseeing the work yourself.
What materials and equipment are essential for a durable outdoor lighting setup?
The materials you choose determine everything. Marine-grade metals like 316 stainless steel and powder-coated extruded aluminum are the industry standard for outdoor lighting that survives decades of weather exposure. These materials resist corrosion, UV degradation, and the freeze-thaw cycles that are common in Calgary winters.
IP ratings are the next non-negotiable. Fixtures rated IP65 to IP67 protect against dust ingress and sustained water exposure. IP65 handles direct water jets; IP67 survives temporary submersion. For rooflines and eaves in a Canadian climate, IP65 is the minimum you should accept.
LED fixtures rated for 50,000 to 100,000 hours translate to 25 or more years at typical outdoor usage rates. That lifespan advantage disappears immediately if you pair quality LEDs with substandard mounting hardware. Precision-fit mounts, mechanical fasteners, and smart controllers complete the professional equipment list.
| Component | Professional Grade | Consumer Grade |
|---|---|---|
| Mounting hardware | Extruded aluminium channels, mechanical fasteners | Plastic clips, adhesive tape |
| Fixture material | 316 stainless steel, powder-coated aluminium | Painted zinc alloy, ABS plastic |
| IP rating | IP65–IP67 | IP44 or unrated |
| Expected lifespan | 25+ years | 2–3 years |
| Warranty | Lifetime or multi-year comprehensive | 1 year or none |
Pro Tip: Colour-match your aluminium channels and mounts to your fascia or soffit. A white mount on a white eave disappears completely during the day, giving your home a clean look that HOAs consistently approve.
What preparatory steps and tools do you need before installation?
Planning before you drill a single hole saves you from costly corrections later. Start with a full site survey: walk the perimeter of your home and note roofline lengths, window positions, porch spans, and any architectural features you want to highlight. Measure twice and record everything. Consistent light spacing and precision-fit mounts improve both the visual result and the long-term structural integrity of the system.
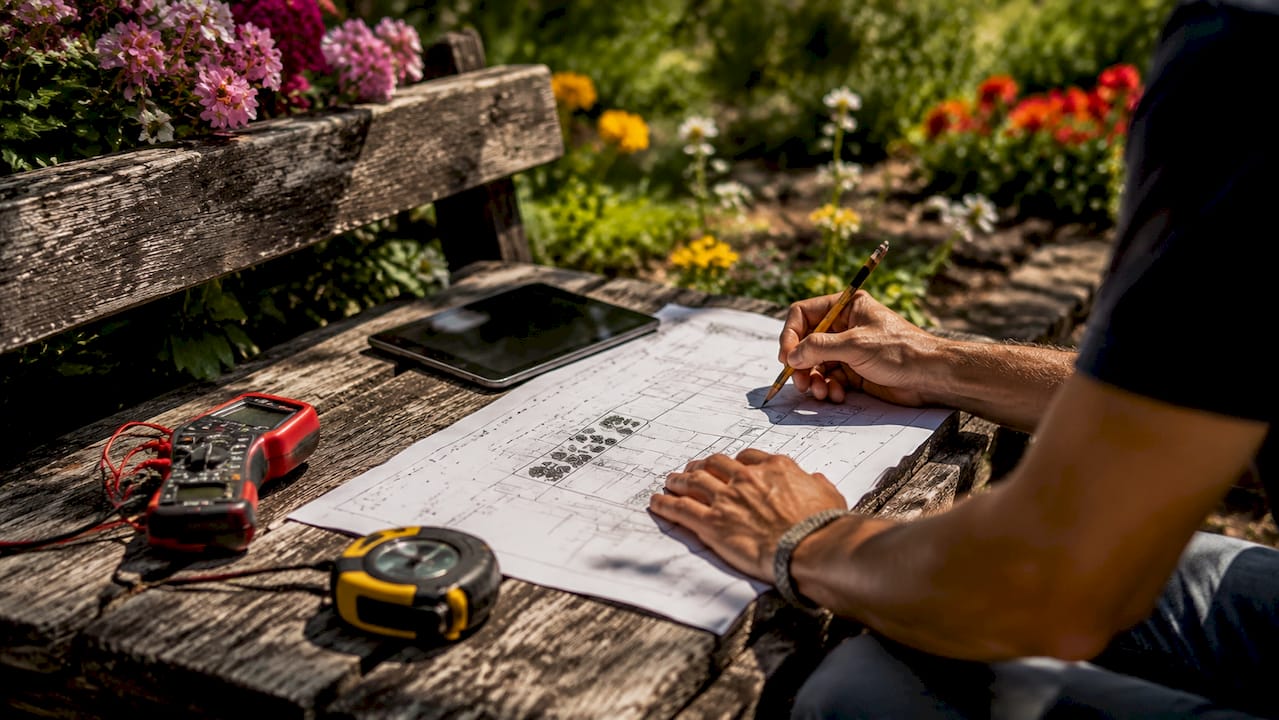
Before you touch any tools, check two things: your local electrical code and your HOA regulations. Many municipalities require a permit for permanent exterior electrical work. Some HOAs restrict fixture colours or brightness levels. Skipping this step can mean removing a completed installation.
Cable routing deserves its own planning session. Decide in advance how wires will travel from the power source to each fixture zone. Routing cables inside soffits or along fascia boards hides them from view and protects them from weather. Separating control cables from high-voltage lines reduces electrical interference and keeps the system reliable over time.
Essential tools and permits checklist:
- Cordless drill with masonry and wood bits
- Tape measure and chalk line
- Multimeter for circuit testing
- Ladders rated for your roof height
- Cable management clips and conduit
- Waterproof wire connectors and sealant
- Electrical permit (where required by local code)
- HOA approval documentation
Pro Tip: If any part of the installation requires working above 3 metres, bring in a licensed electrician or professional installer. The cost of a professional is far lower than the cost of a fall or a failed inspection.
Step-by-step process for installing a durable outdoor lighting system
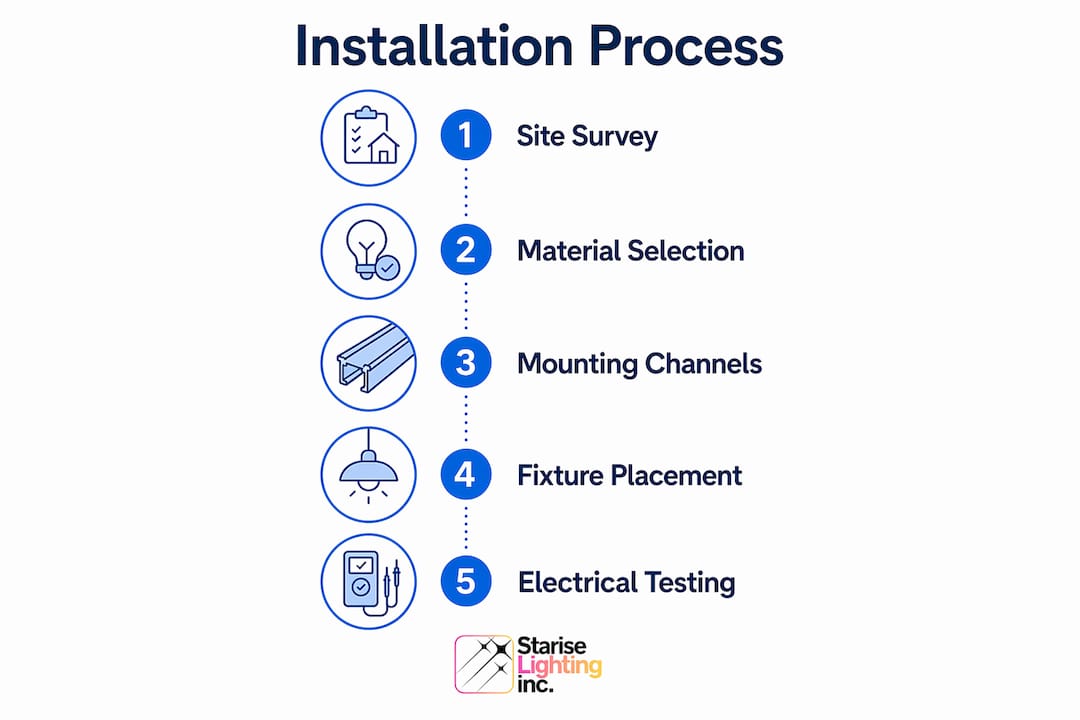
A professional permanent outdoor LED installation typically takes one full day for an average-sized home. Knowing the phases in advance helps you schedule the work and set realistic expectations.
Installation steps:
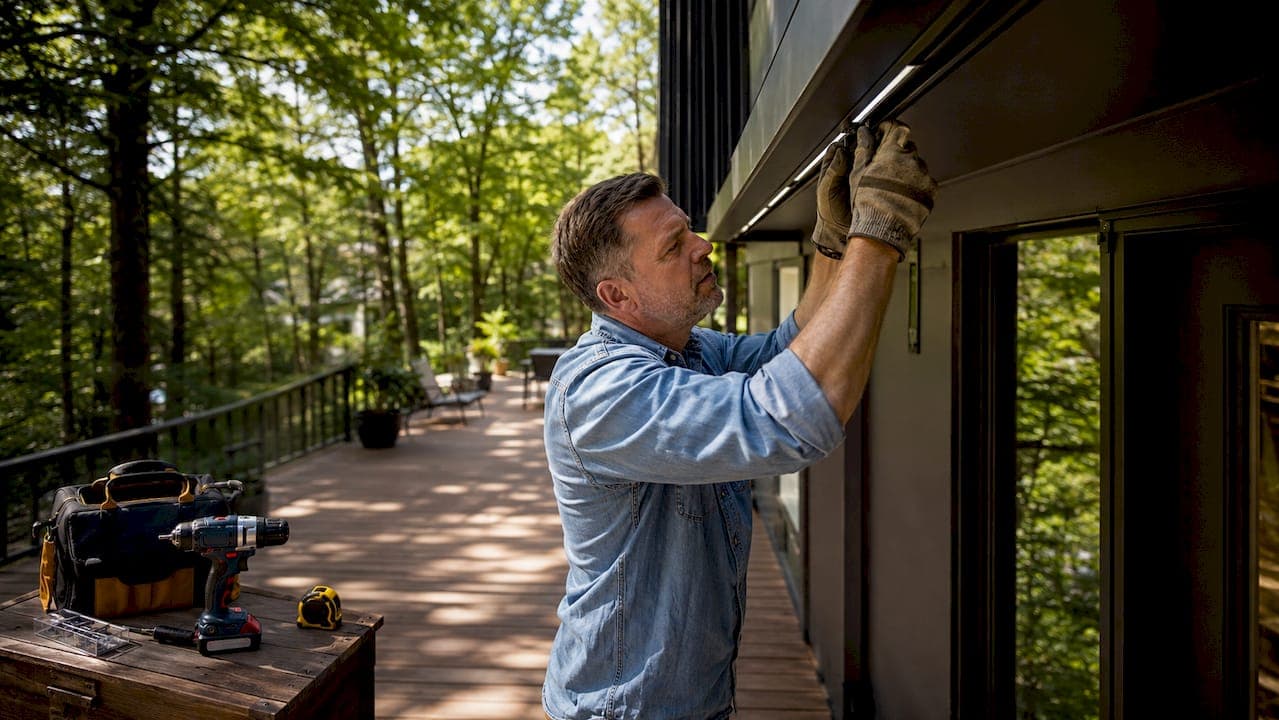
- Mount the aluminium channels. Attach extruded aluminium tracks to rooflines, fascia boards, and porch edges using mechanical fasteners. Never rely on adhesive alone. Fasteners hold through wind, ice, and thermal expansion.
- Position fixtures precisely. Place LED fixtures along rooflines, above windows, and across porch spans following your site survey measurements. Aligning fixtures with rooflines and windows avoids overcrowding and eliminates visual clutter.
- Route and secure cables. Run cables through channels or inside soffits. Secure every 30 centimetres with colour-matched clips. Keep low-voltage control cables physically separated from 110V mains wiring.
- Seal all electrical connections. Apply waterproof sealant to every junction and connector. Proper sealing of electrical connections is the single most important step for preventing premature system failure.
- Connect the smart controller. Wire the controller according to the manufacturer's wiring diagram. Connect to your home Wi-Fi or the dedicated app.
- Run a full system test. Test every zone, every colour channel, and every scheduling function before closing up any access panels.
| Installation Phase | Typical Time Estimate |
|---|---|
| Mounting aluminium channels | 3–5 hours |
| Fixture placement and cabling | 2–3 hours |
| Electrical sealing and connections | 1–2 hours |
| Smart controller setup and testing | 45–90 minutes |
| Final inspection and cleanup | 30–45 minutes |
How should homeowners maintain their outdoor lighting for long-term durability?
Monthly visual inspections and annual electrical checks extend a lighting system's life well beyond 20 years. That figure stands in sharp contrast to the 2–3 year lifespan of typical consumer DIY kits. Maintenance is not optional; it is the mechanism that protects your investment.
Monthly checks take less than 15 minutes. Walk the perimeter and look for sagging wires, loose mounts, or any fixture that has shifted out of alignment. After a Calgary hailstorm or a heavy snowfall, run a quick system test to confirm every zone is responding. Catching a loose connection early costs nothing. Ignoring it until a controller fails costs significantly more.
Annual professional electrical checks cover what you cannot see from the ground. A licensed electrician will test cable insulation integrity, inspect waterproof seals at every junction, and verify that the smart controller firmware is current. Pair this with a lens cleaning session. Dirt and oxidation on fixture lenses reduce light output noticeably over time. Exterior lighting cleanliness directly affects both performance and appearance.
Annual maintenance checklist:
- Visual inspection of all mounts and channels for movement or corrosion
- Lens cleaning with a non-abrasive cloth and mild detergent
- Waterproof seal inspection at all cable junctions
- Full system commissioning test after severe weather
- Professional electrical check of cable insulation and controller function
- Review of warranty terms and any available service plan updates
Pro Tip: Choose a lighting system with modular LED components that allow individual module replacement. Swapping one failed LED engine takes minutes and costs a fraction of replacing an entire fixture.
What common mistakes should you avoid during setup?
The most damaging mistake in durable lighting installation is using consumer-grade plastic clips and adhesive mounts. Plastic clips degrade rapidly under UV exposure and temperature swings, causing sagging wires and eventual fixture damage. Professional extruded aluminium channels maintain structural integrity for decades under the same conditions.
Improper cable routing is the second most common failure point. Cables left exposed on exterior walls absorb heat in summer and contract in winter. That repeated stress cracks insulation and creates moisture entry points. Routing cables inside soffits or through conduit eliminates that risk entirely.
Uneven fixture spacing is a mistake that costs nothing to prevent during planning but is expensive to correct after installation. Fixtures placed without a measured layout create pools of light and dark gaps that make a home look unfinished rather than polished.
Troubleshooting steps when problems arise:
- Check the smart controller app for zone-specific fault alerts
- Use a multimeter to test voltage at each fixture connection point
- Inspect waterproof seals at any junction showing moisture or corrosion
- Replace individual modular LED engines before assuming the full fixture has failed
- Re-seal any connector that shows signs of moisture ingress with fresh waterproof sealant
- Contact your installer if a full zone goes dark, as this typically indicates a controller or main cable issue
Pro Tip: Verify IP ratings and material certifications on the product specification sheet before purchasing any fixture. A label that reads "weather resistant" without an IP number is a marketing claim, not a technical standard.
Key takeaways
A durable outdoor lighting system depends equally on professional-grade materials, precise installation technique, and consistent maintenance routines.
| Point | Details |
|---|---|
| Material selection is foundational | Use 316 stainless steel, powder-coated aluminium, and IP65-rated fixtures as your baseline. |
| Mechanical fasteners outperform adhesives | Extruded aluminium channels with mechanical fasteners last 25+ years; plastic clips fail within 2–3 years. |
| Cable routing protects the whole system | Route cables inside soffits, seal every junction, and separate control cables from mains wiring. |
| Maintenance extends lifespan beyond 20 years | Monthly visual checks and annual professional electrical inspections are the minimum standard. |
| Modular components reduce long-term cost | Systems with replaceable LED engines lower repair costs and reduce waste over the fixture's life. |
What i've learned after years of outdoor lighting installations
Most homeowners who come to me after a failed DIY attempt made the same error. They bought a kit based on how it looked in the box, not on what it was made of. Plastic clips and adhesive strips look fine in a warm showroom. They look very different after a Calgary February.
The uncomfortable truth about long-lasting lighting solutions is that the LED chip is rarely what fails. What fails is the mount, the seal, or the cable routing. I have seen premium LED fixtures go dark within two years because the installer used the wrong connector sealant. The chip was still functional. The moisture got in through a poorly sealed junction and corroded the driver.
The homeowners who get the best results are the ones who treat the mounting and sealing phases with the same attention they give to fixture selection. They also ask the right warranty question. Warranty coverage should include all system components, including the controller and mounting hardware, for at least 10 years. A warranty that only covers the LED chip is not a warranty worth citing.
My honest recommendation: get involved in the planning phase even if you are hiring a professional. Review the material specifications, confirm the IP ratings, and ask to see the cable routing plan before work begins. That level of oversight costs you nothing and protects your investment completely.
— Starise
Ready to install lighting that lasts? Co-starise can help
Co-starise specialises in permanent outdoor lighting built on marine-grade aluminium channels, IP65-rated Gen 2 24V LED fixtures, and smart app control. Every installation follows the same rigorous process described in this guide, with full waterproof sealing, precise fixture alignment, and a comprehensive multi-year warranty covering all system components.

Co-starise serves homeowners across Calgary and Edmonton with professional installation teams who handle everything from site survey to final commissioning test. If you want a system that performs on the coldest January night and still looks sharp every evening for decades, explore Edmonton installations or request a quote for your Calgary home today.
FAQ
What is the minimum IP rating for outdoor lighting fixtures?
IP65 is the minimum acceptable rating for permanent outdoor fixtures. Fixtures rated IP65 to IP67 protect against dust and direct water exposure, which is the standard required for roofline and eave installations.
How long does a professional outdoor lighting installation take?
A professional permanent LED installation typically takes one full day for an average-sized home. Mounting aluminium channels takes 3–5 hours, with testing and smart controller setup requiring an additional 45–90 minutes.
Why do DIY lighting kits fail so quickly?
DIY kits rely on plastic clips and adhesive mounts that degrade under UV exposure and temperature changes, giving them a typical lifespan of 2–3 years. Professional systems use mechanically fastened aluminium channels rated for 25 or more years.
How often should outdoor lighting systems be inspected?
Monthly visual inspections and annual professional electrical checks are the standard maintenance schedule. This routine extends system life well beyond 20 years and catches small issues before they become costly failures.
What should a lighting system warranty cover?
A comprehensive warranty covers all system components, including the controller, mounting hardware, and LED fixtures, for a minimum of 10 years. Warranties that cover only the LED chip leave the most failure-prone components unprotected.